Analytics event tracking
Gain insights into your customers' behavior and make data-driven decisions about how your Ply portals should work
Overview
With Ply's visual event dispatcher, you can easily connect your portals to analytics platforms and track events at key points in the portal workflow.
You can even send data from the workflow as event parameter values, so that you can analyze exactly who did what.
Creating a tracking destination
Setting up a tracking destination is a lot like creating an app connection. The destination is saved in a space, which determines who has access to use it in features.
From the Ply dashboard, go to Connections > Tracking destinations.
Click Add destination. Choose which space to save the destination in, choose the tracking app from the list of destinations, and give your destination a name.
Provide the unique identifier from the chosen tracking app and click Save.
Get your destination's unique identifier
Every app has slightly different setup for tracking destinations. See below for your app. Have questions? Send us a message in the in-app chat or at team@ply.io.
Meta Pixel
Go to the Meta Business Suite dashboard here
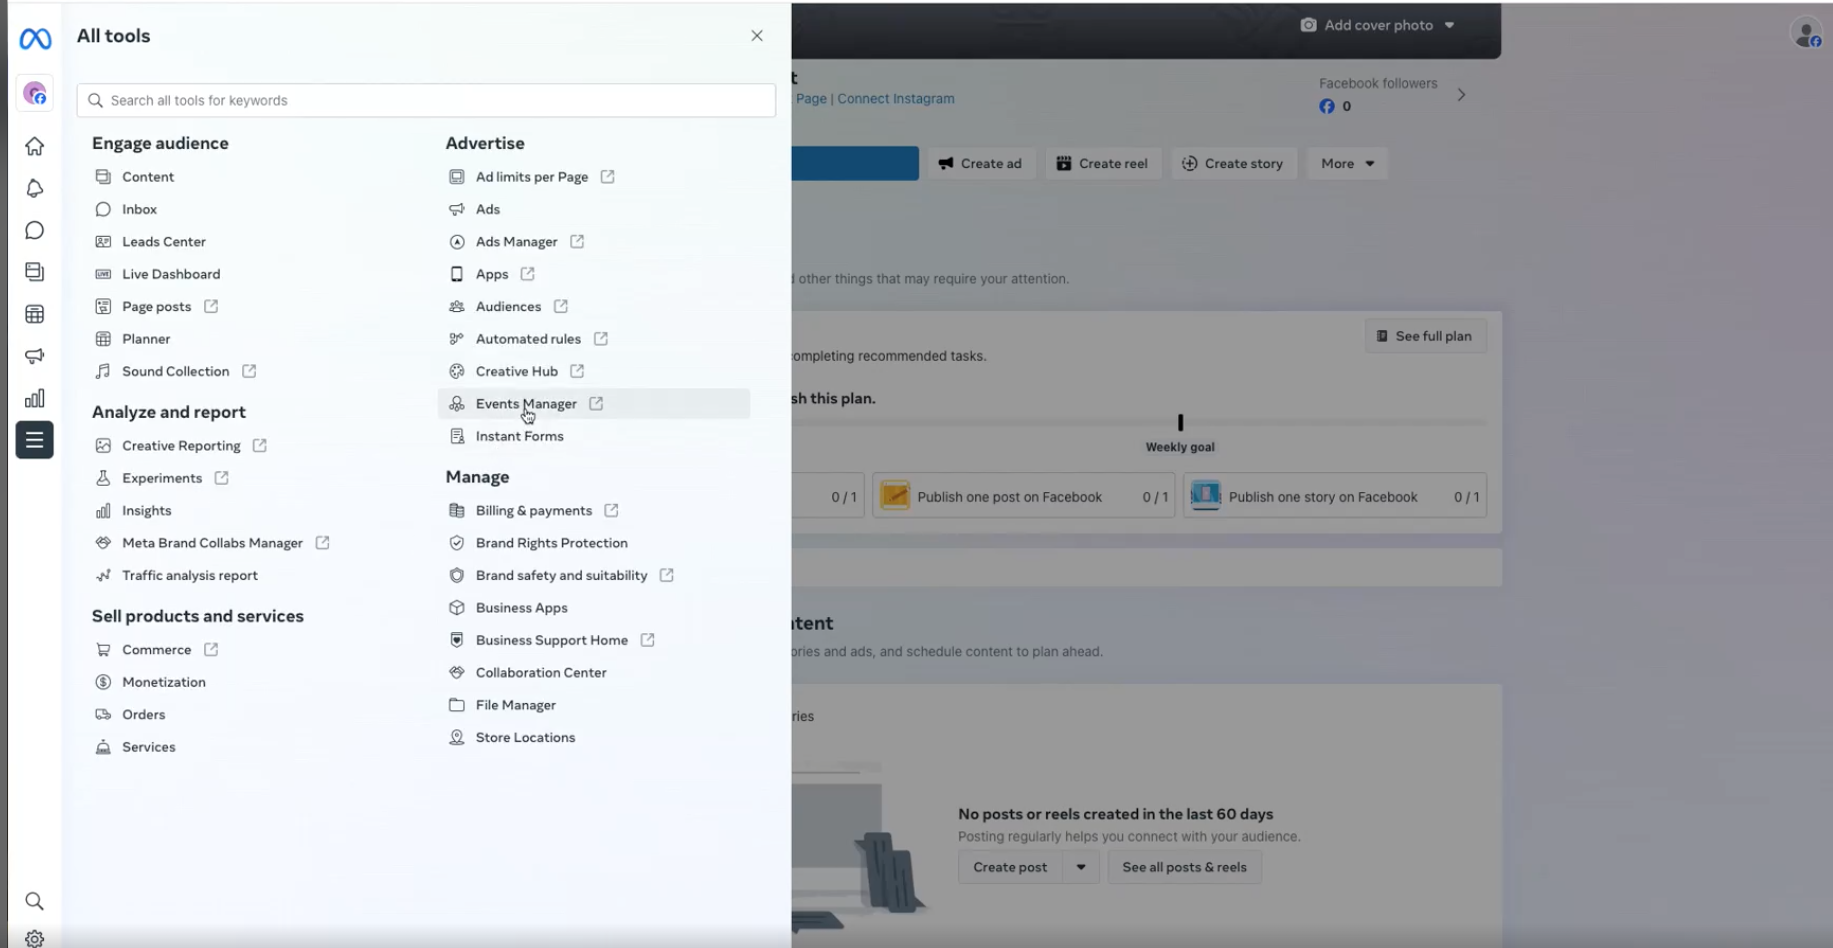
Go to Events manager (left menu under All tools)
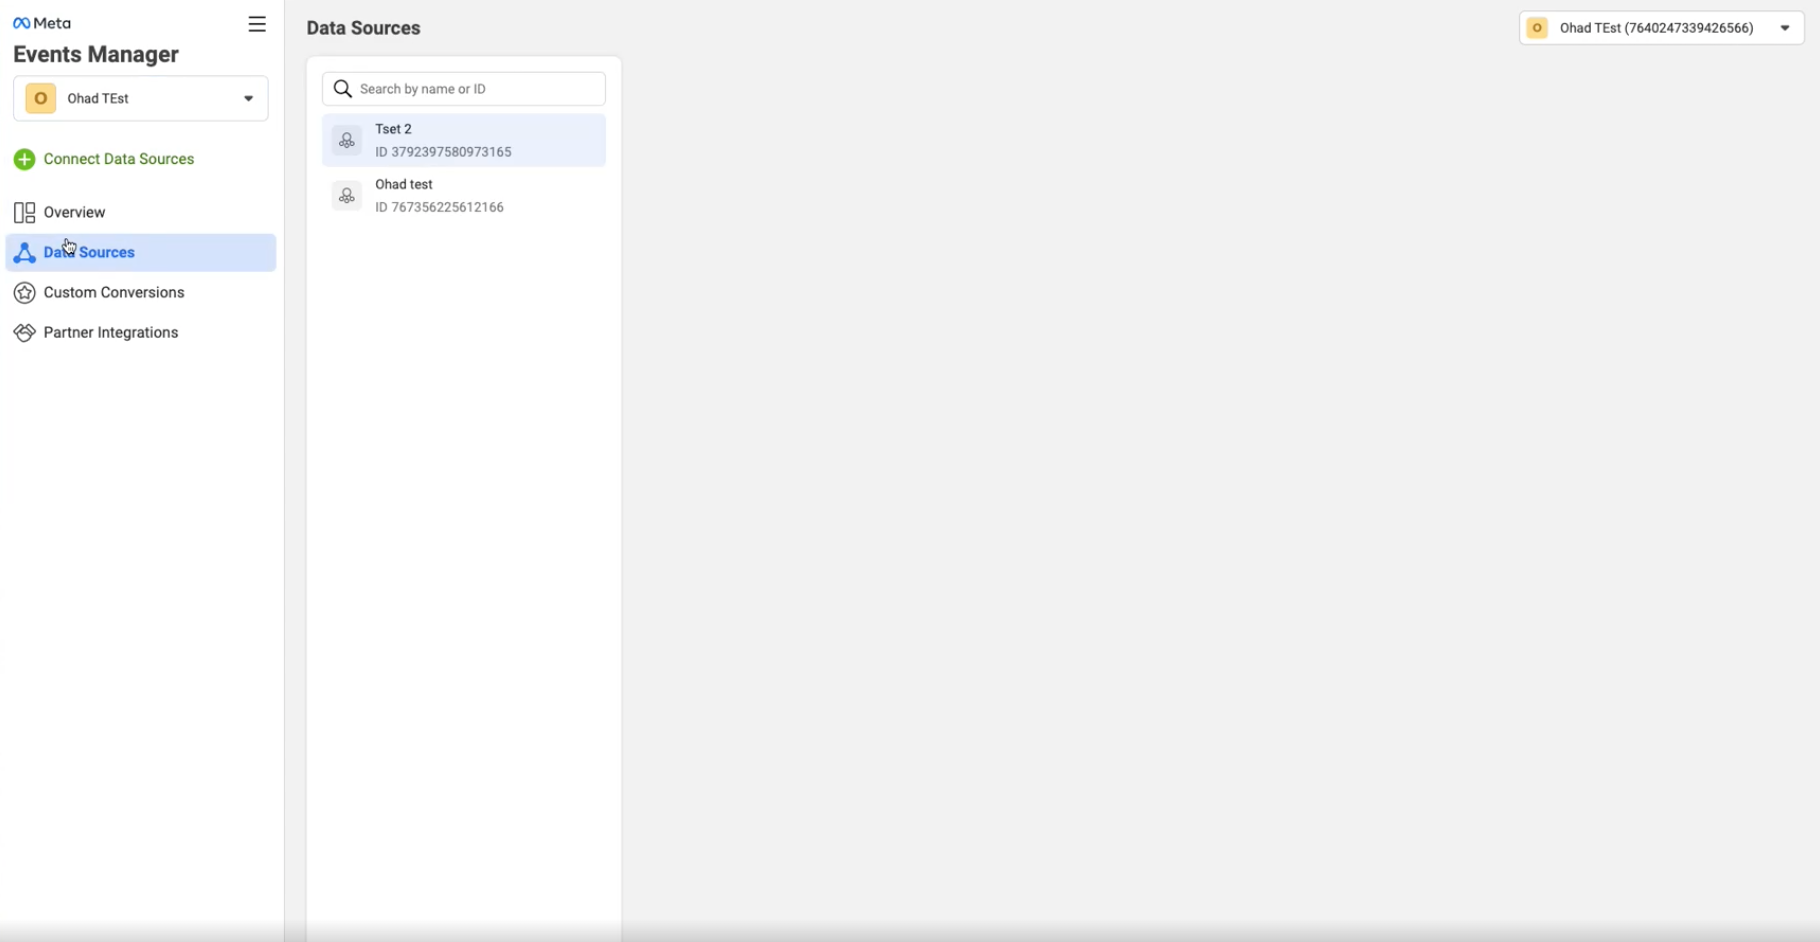
Go to Data sources
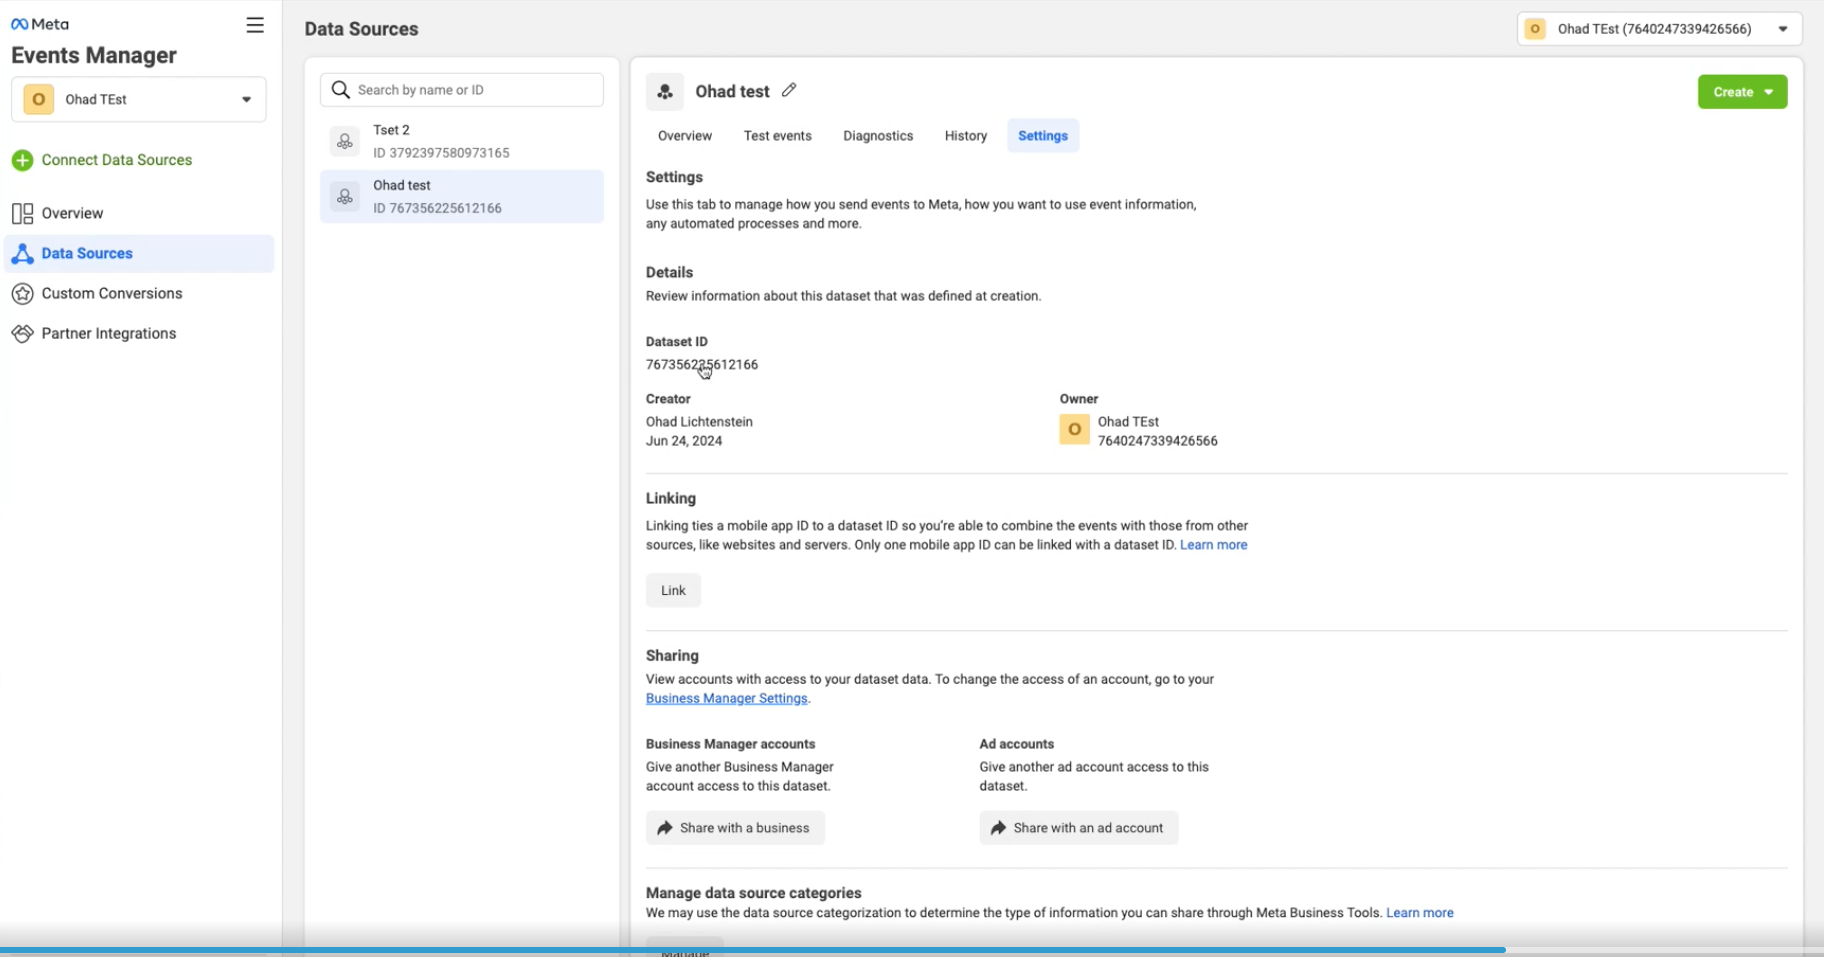
Select an existing data source or create a new one. Under Settings, copy the Dataset ID into the destination setup
Google Analytics
Go the the Google Analytics dashboard here
Open Admin settings
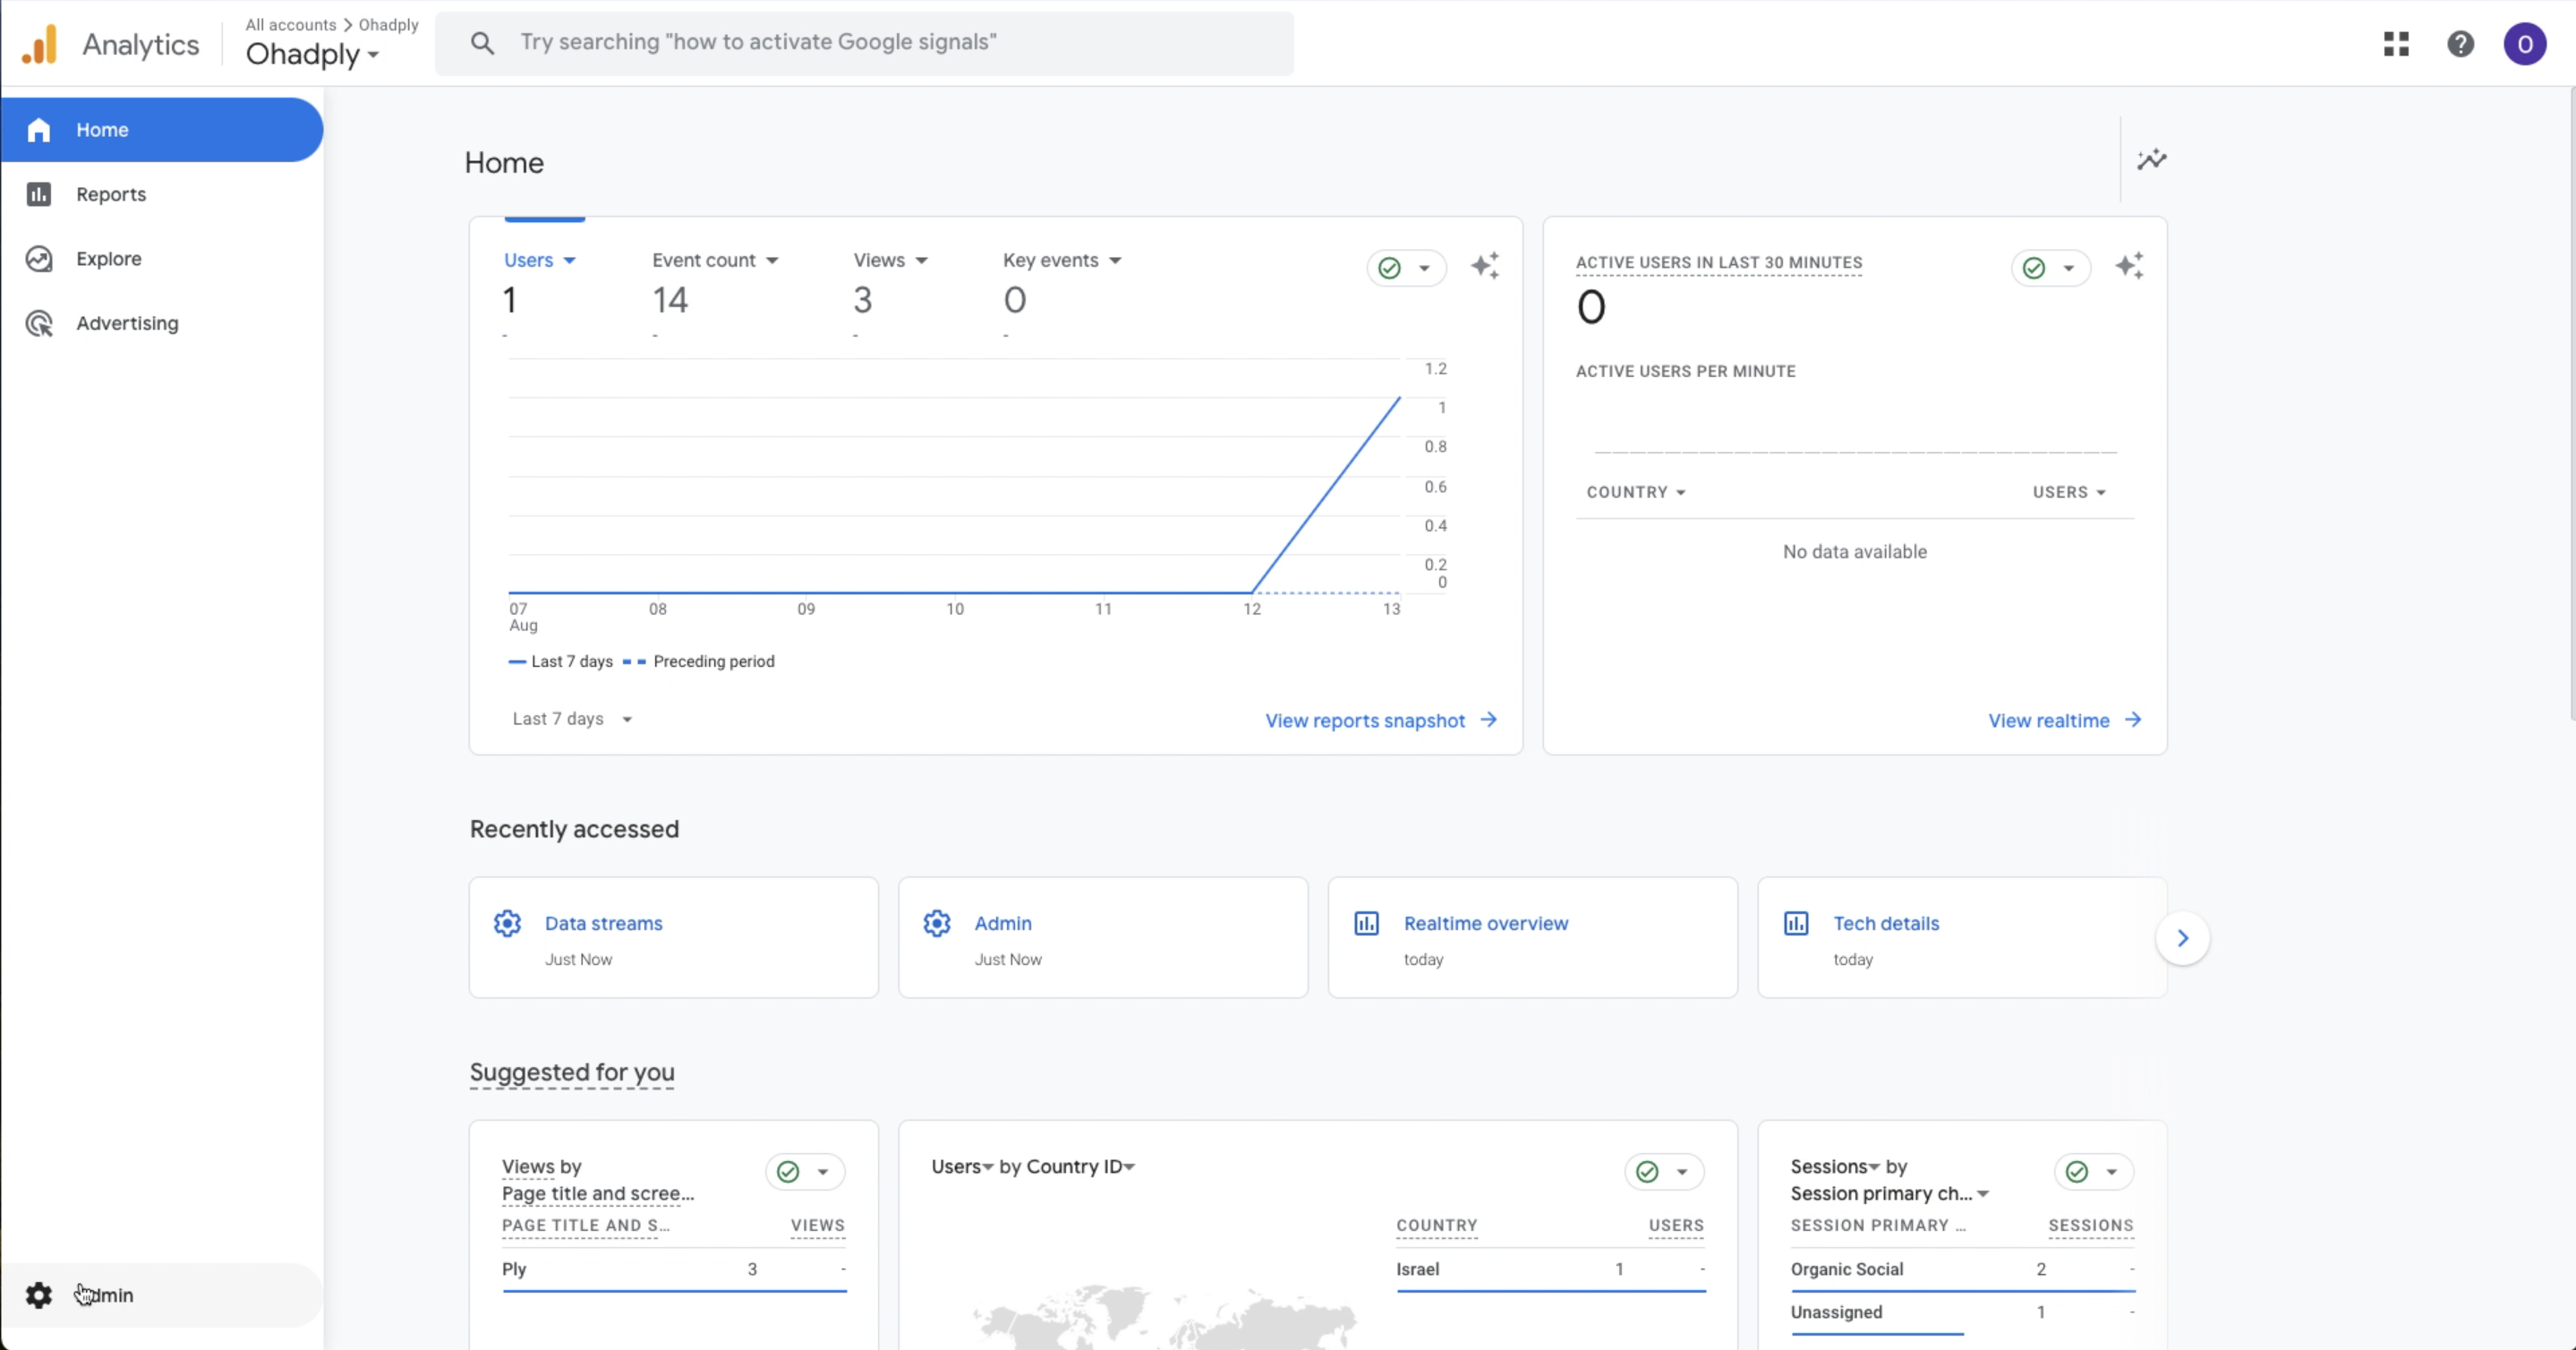
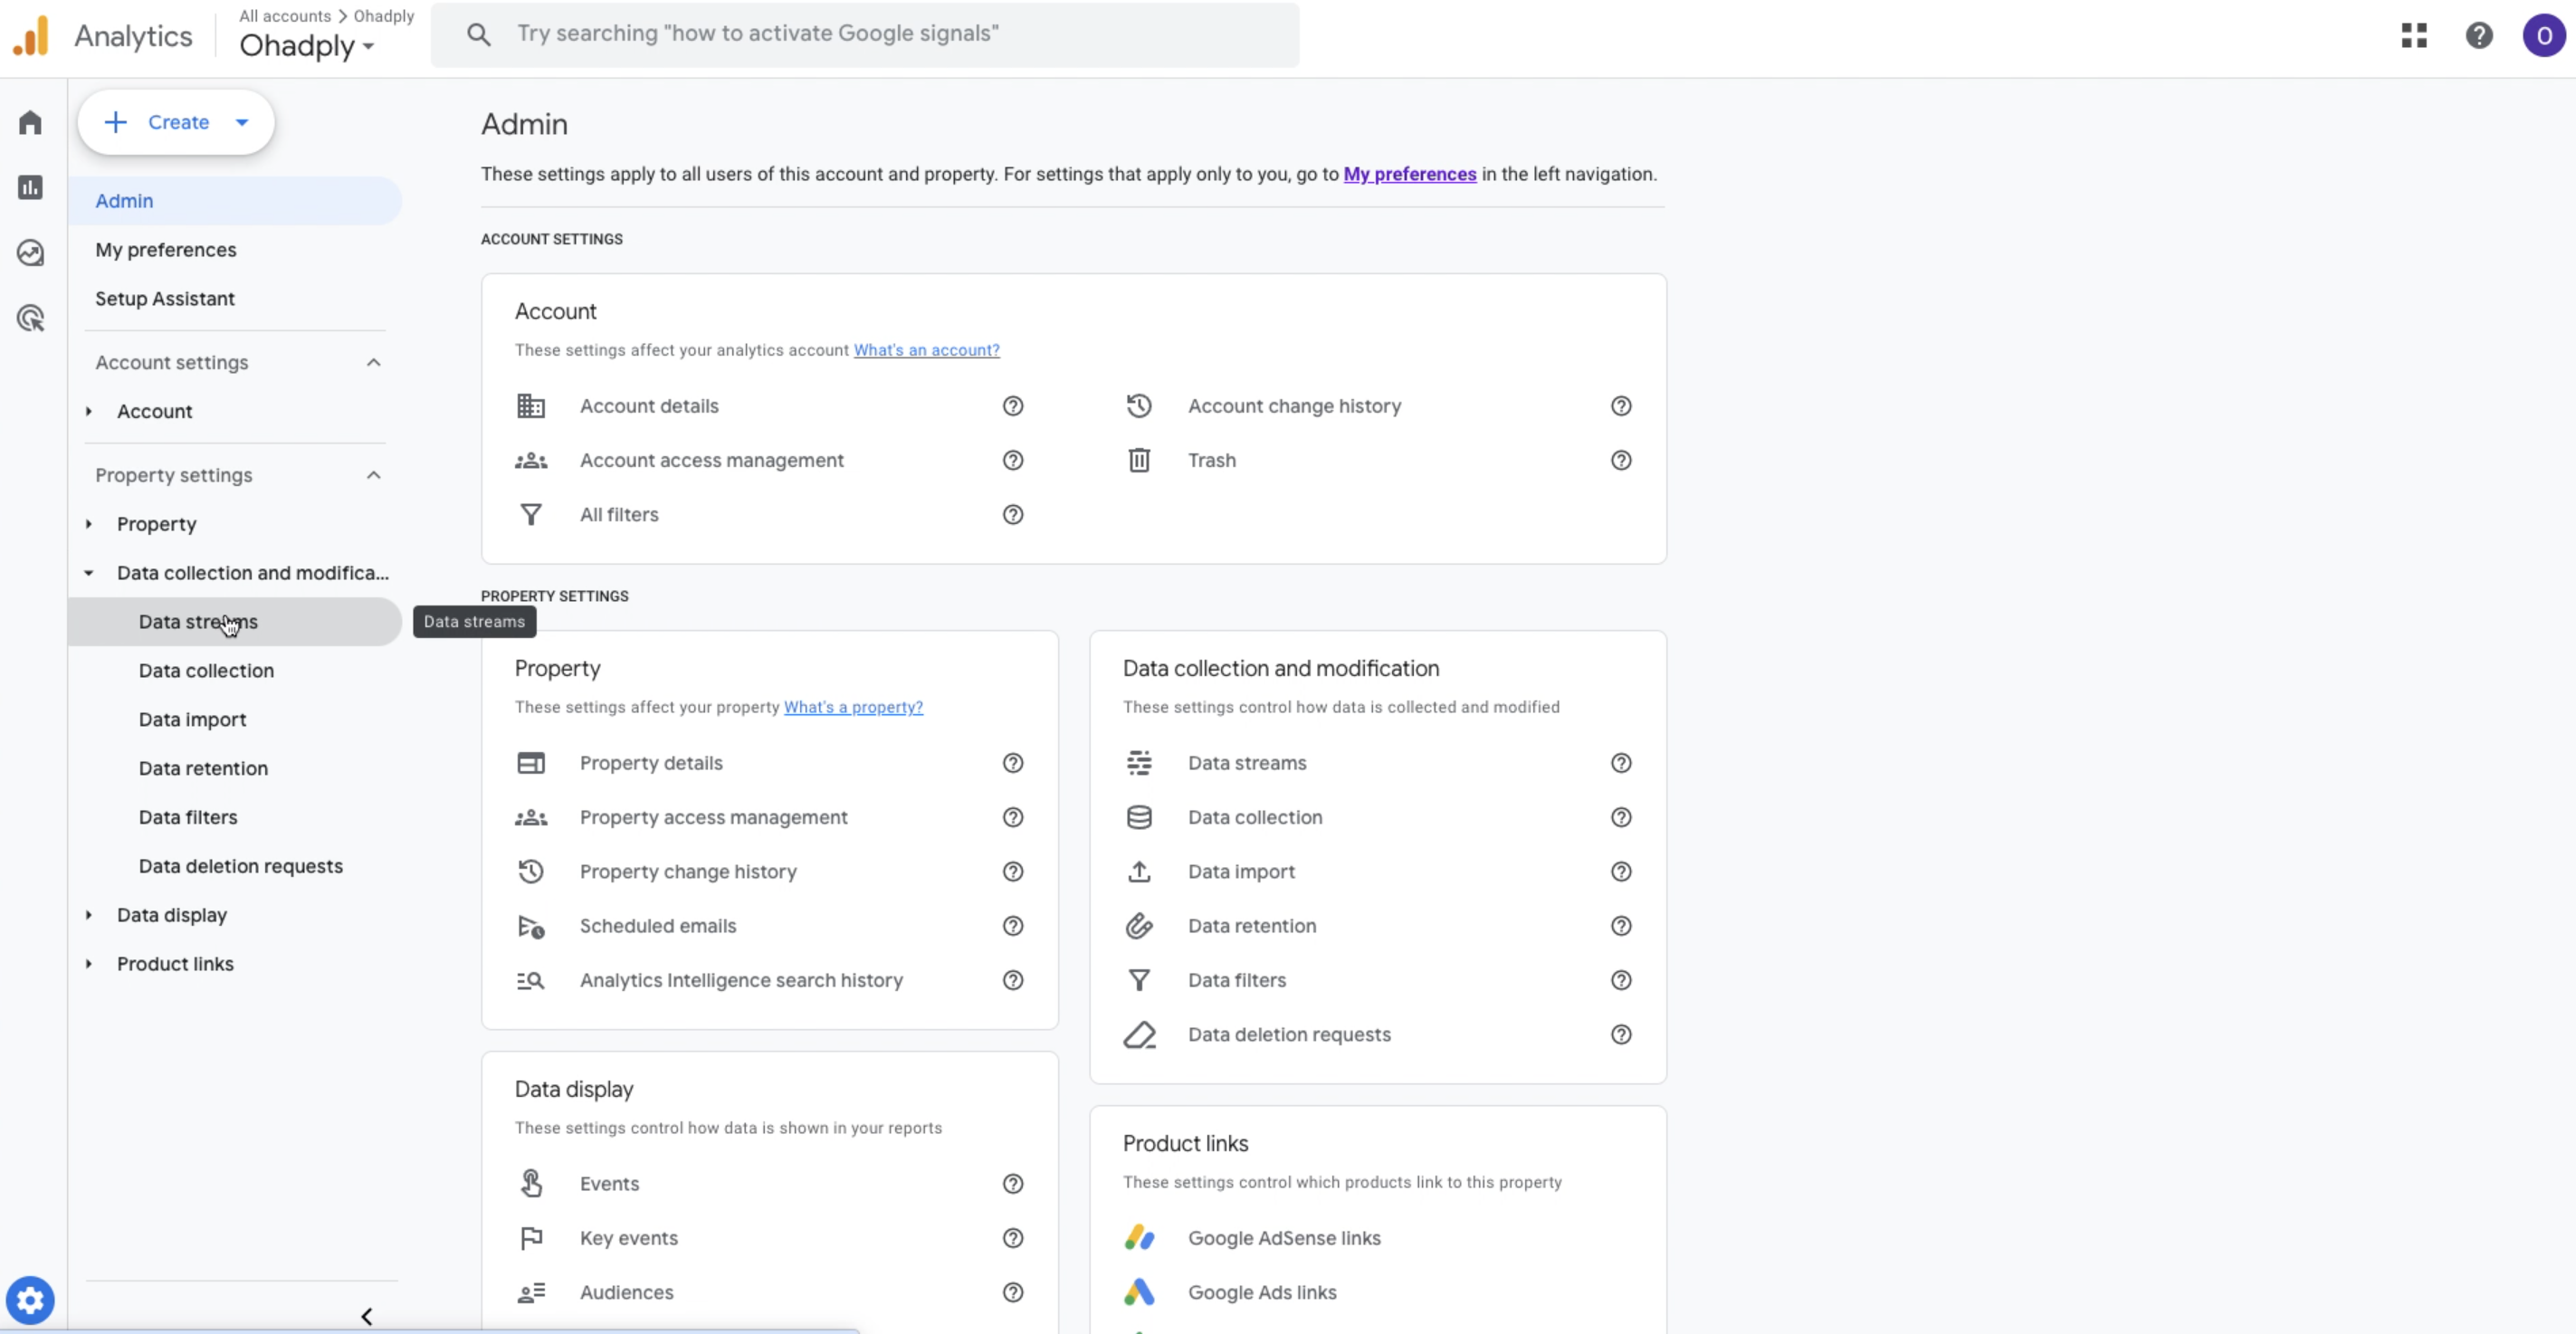
Open Account details > Data collection and modification > Data streams
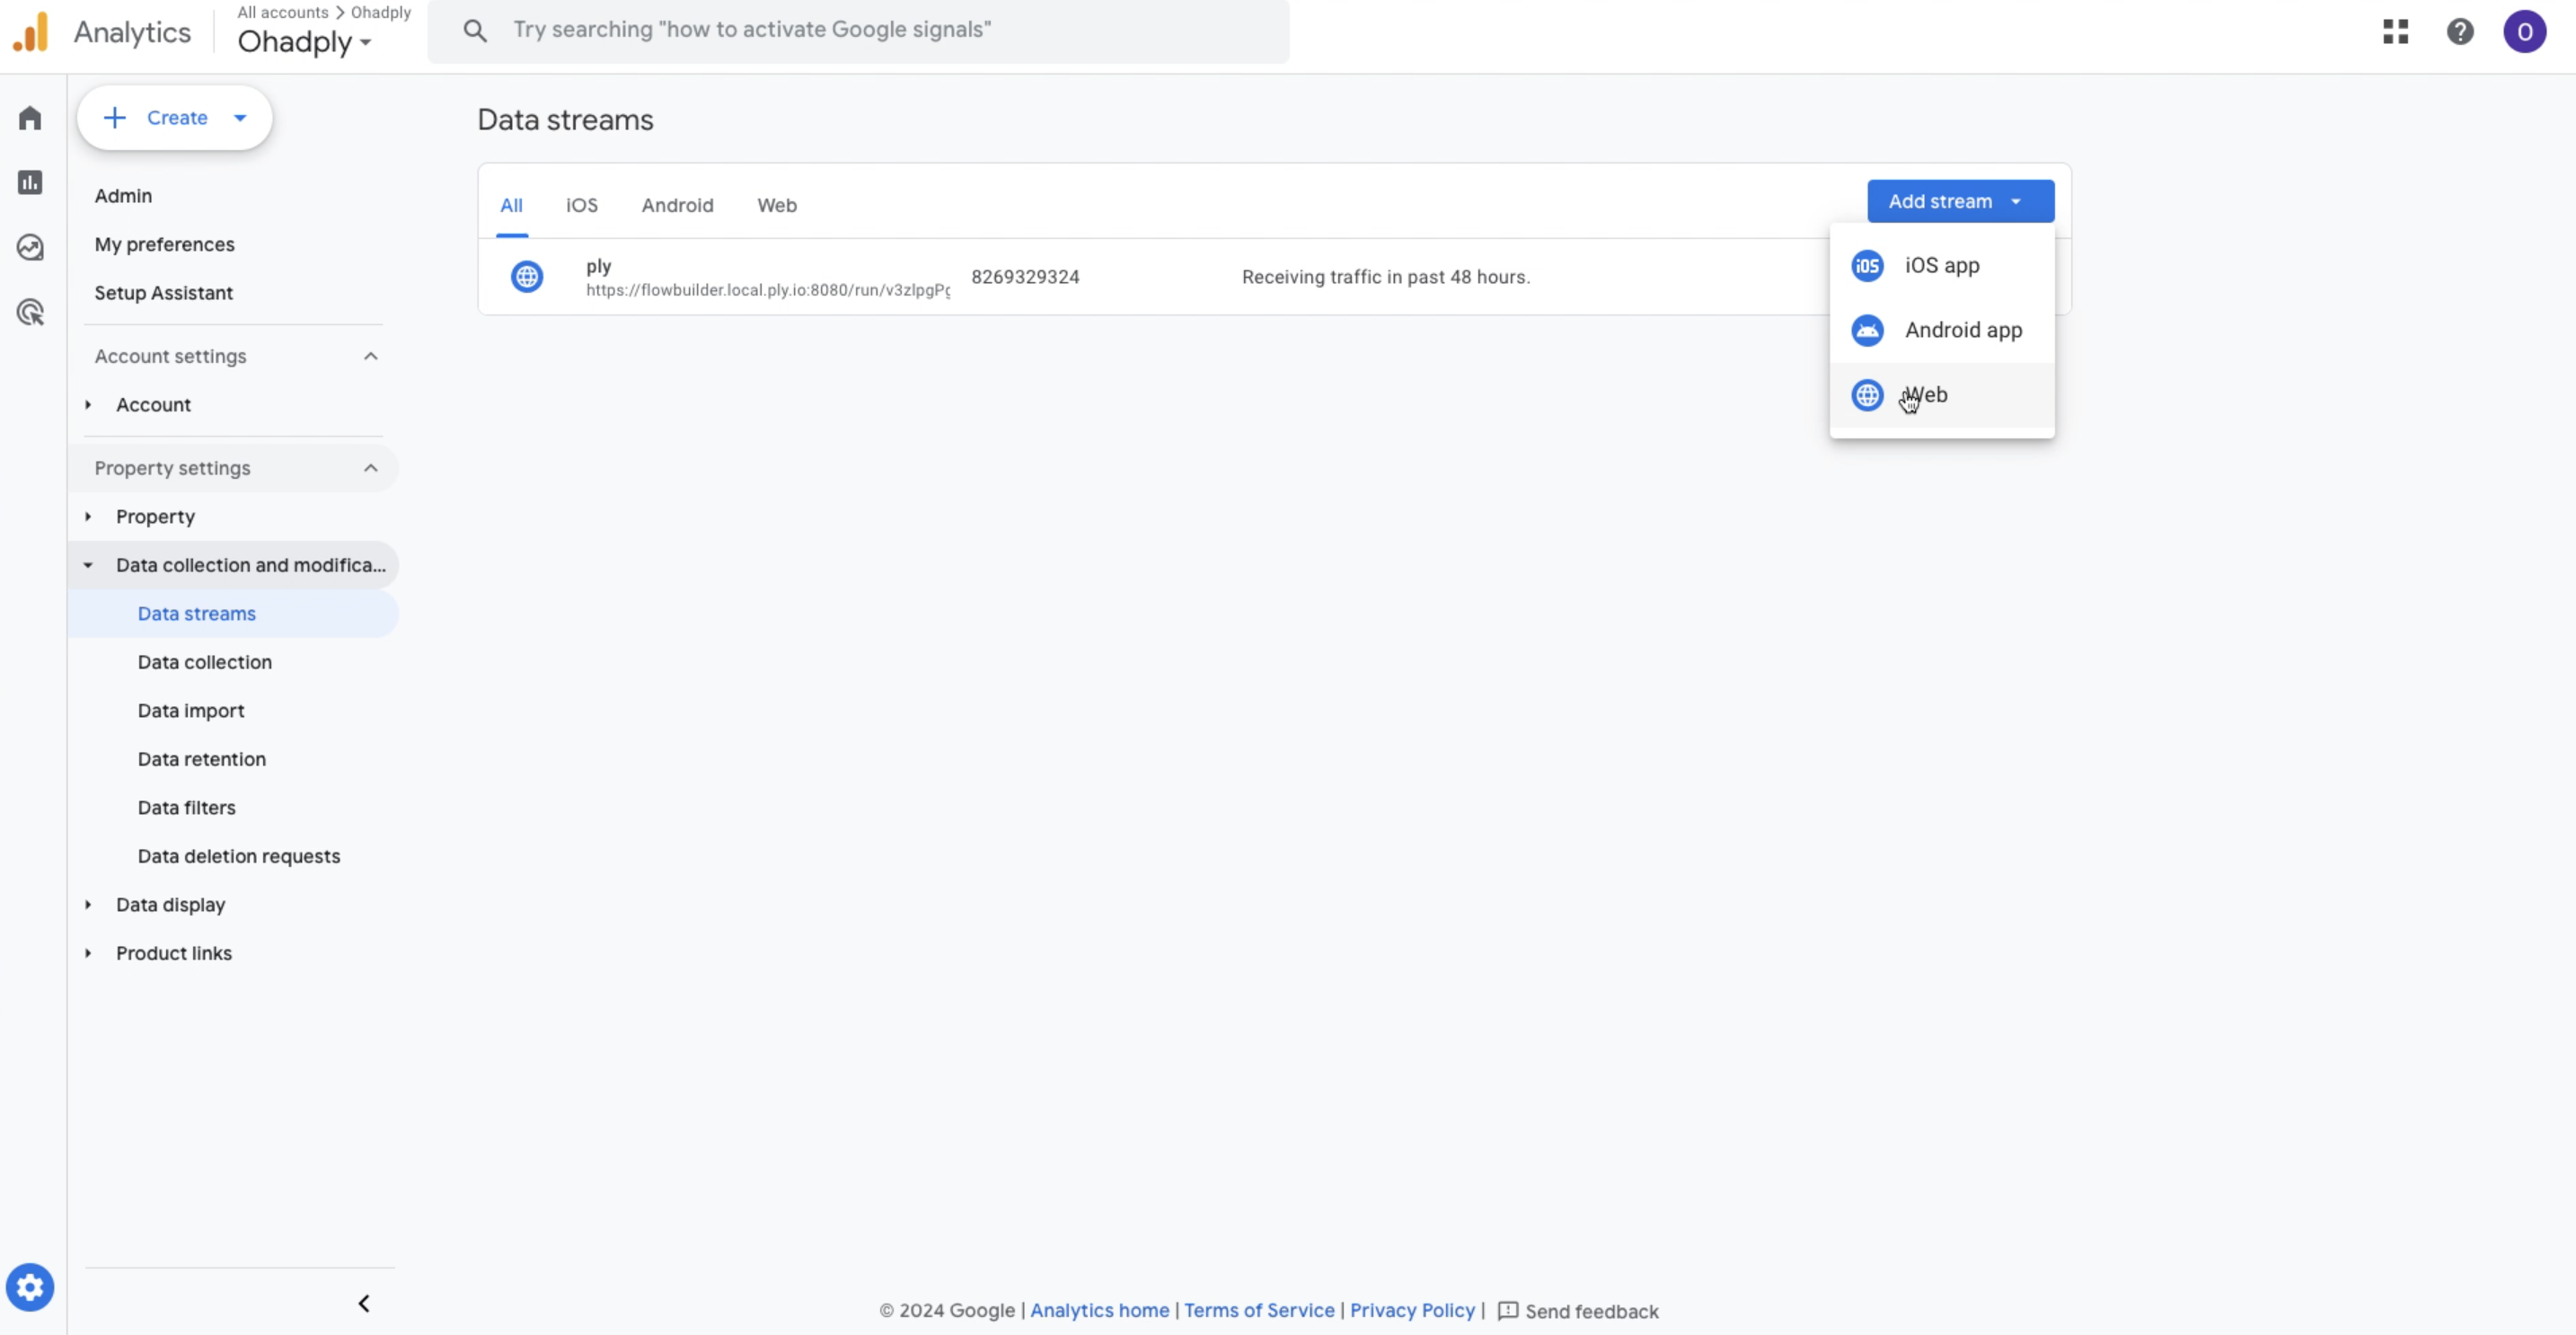
Add a web stream
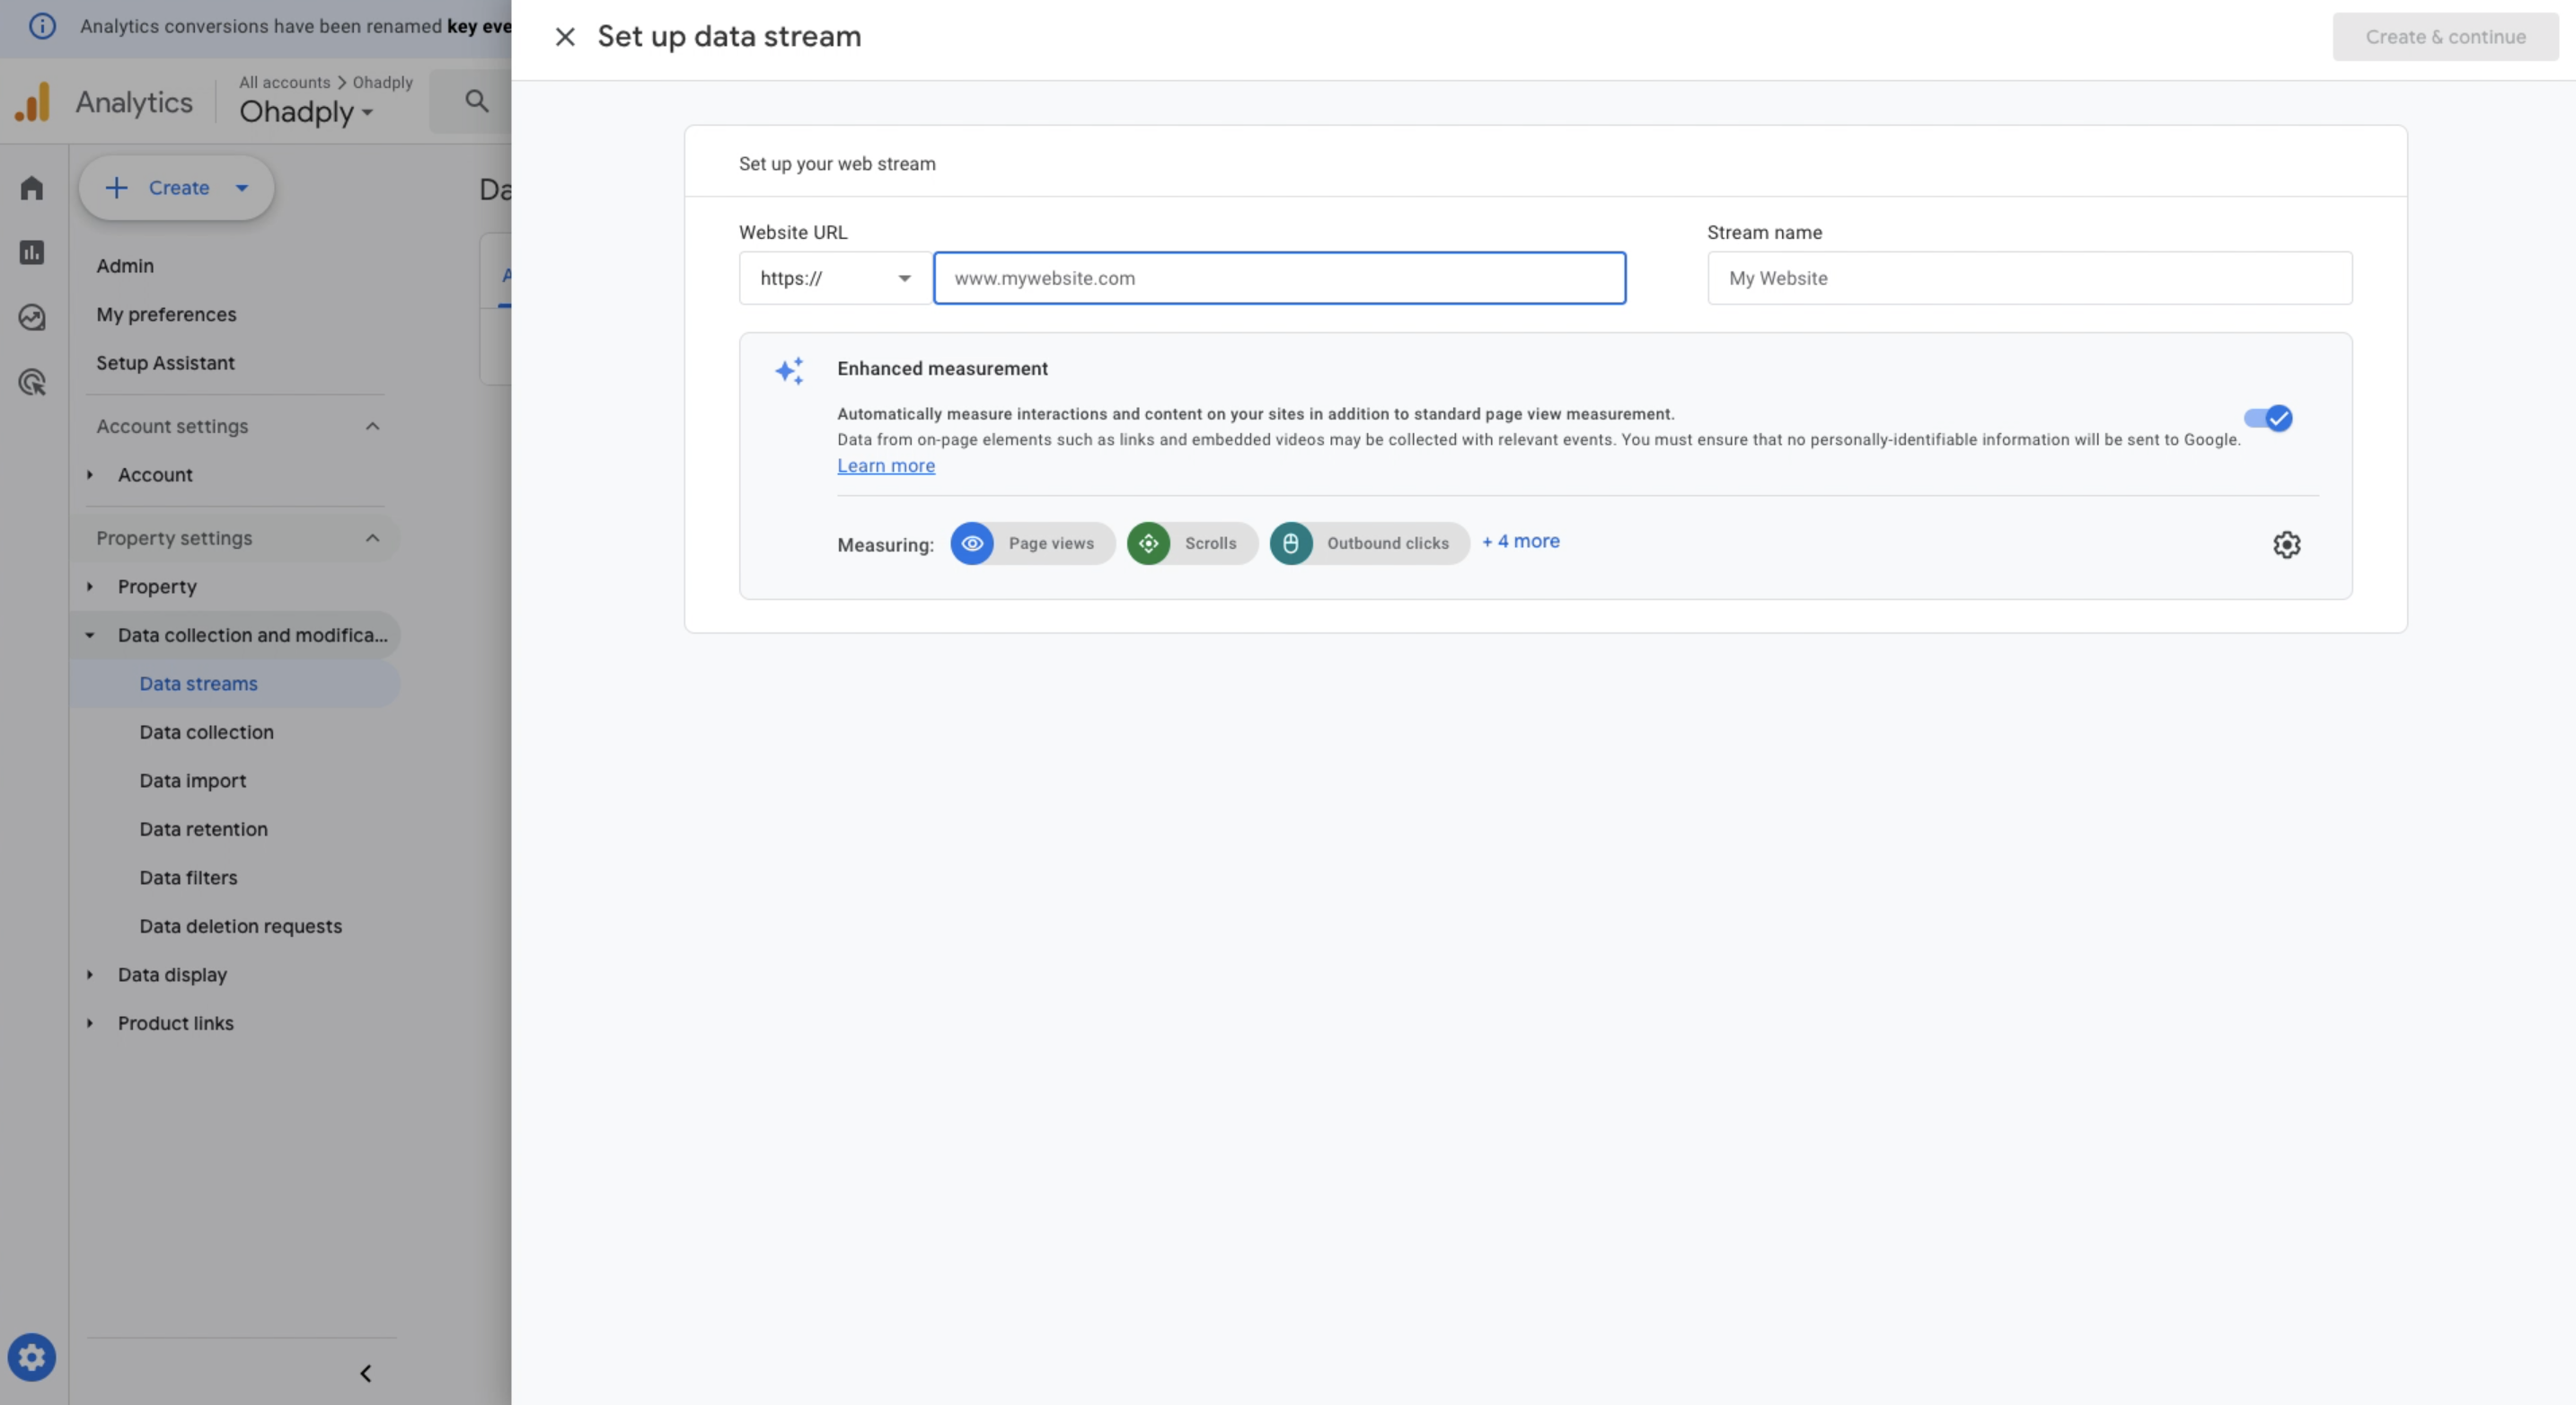
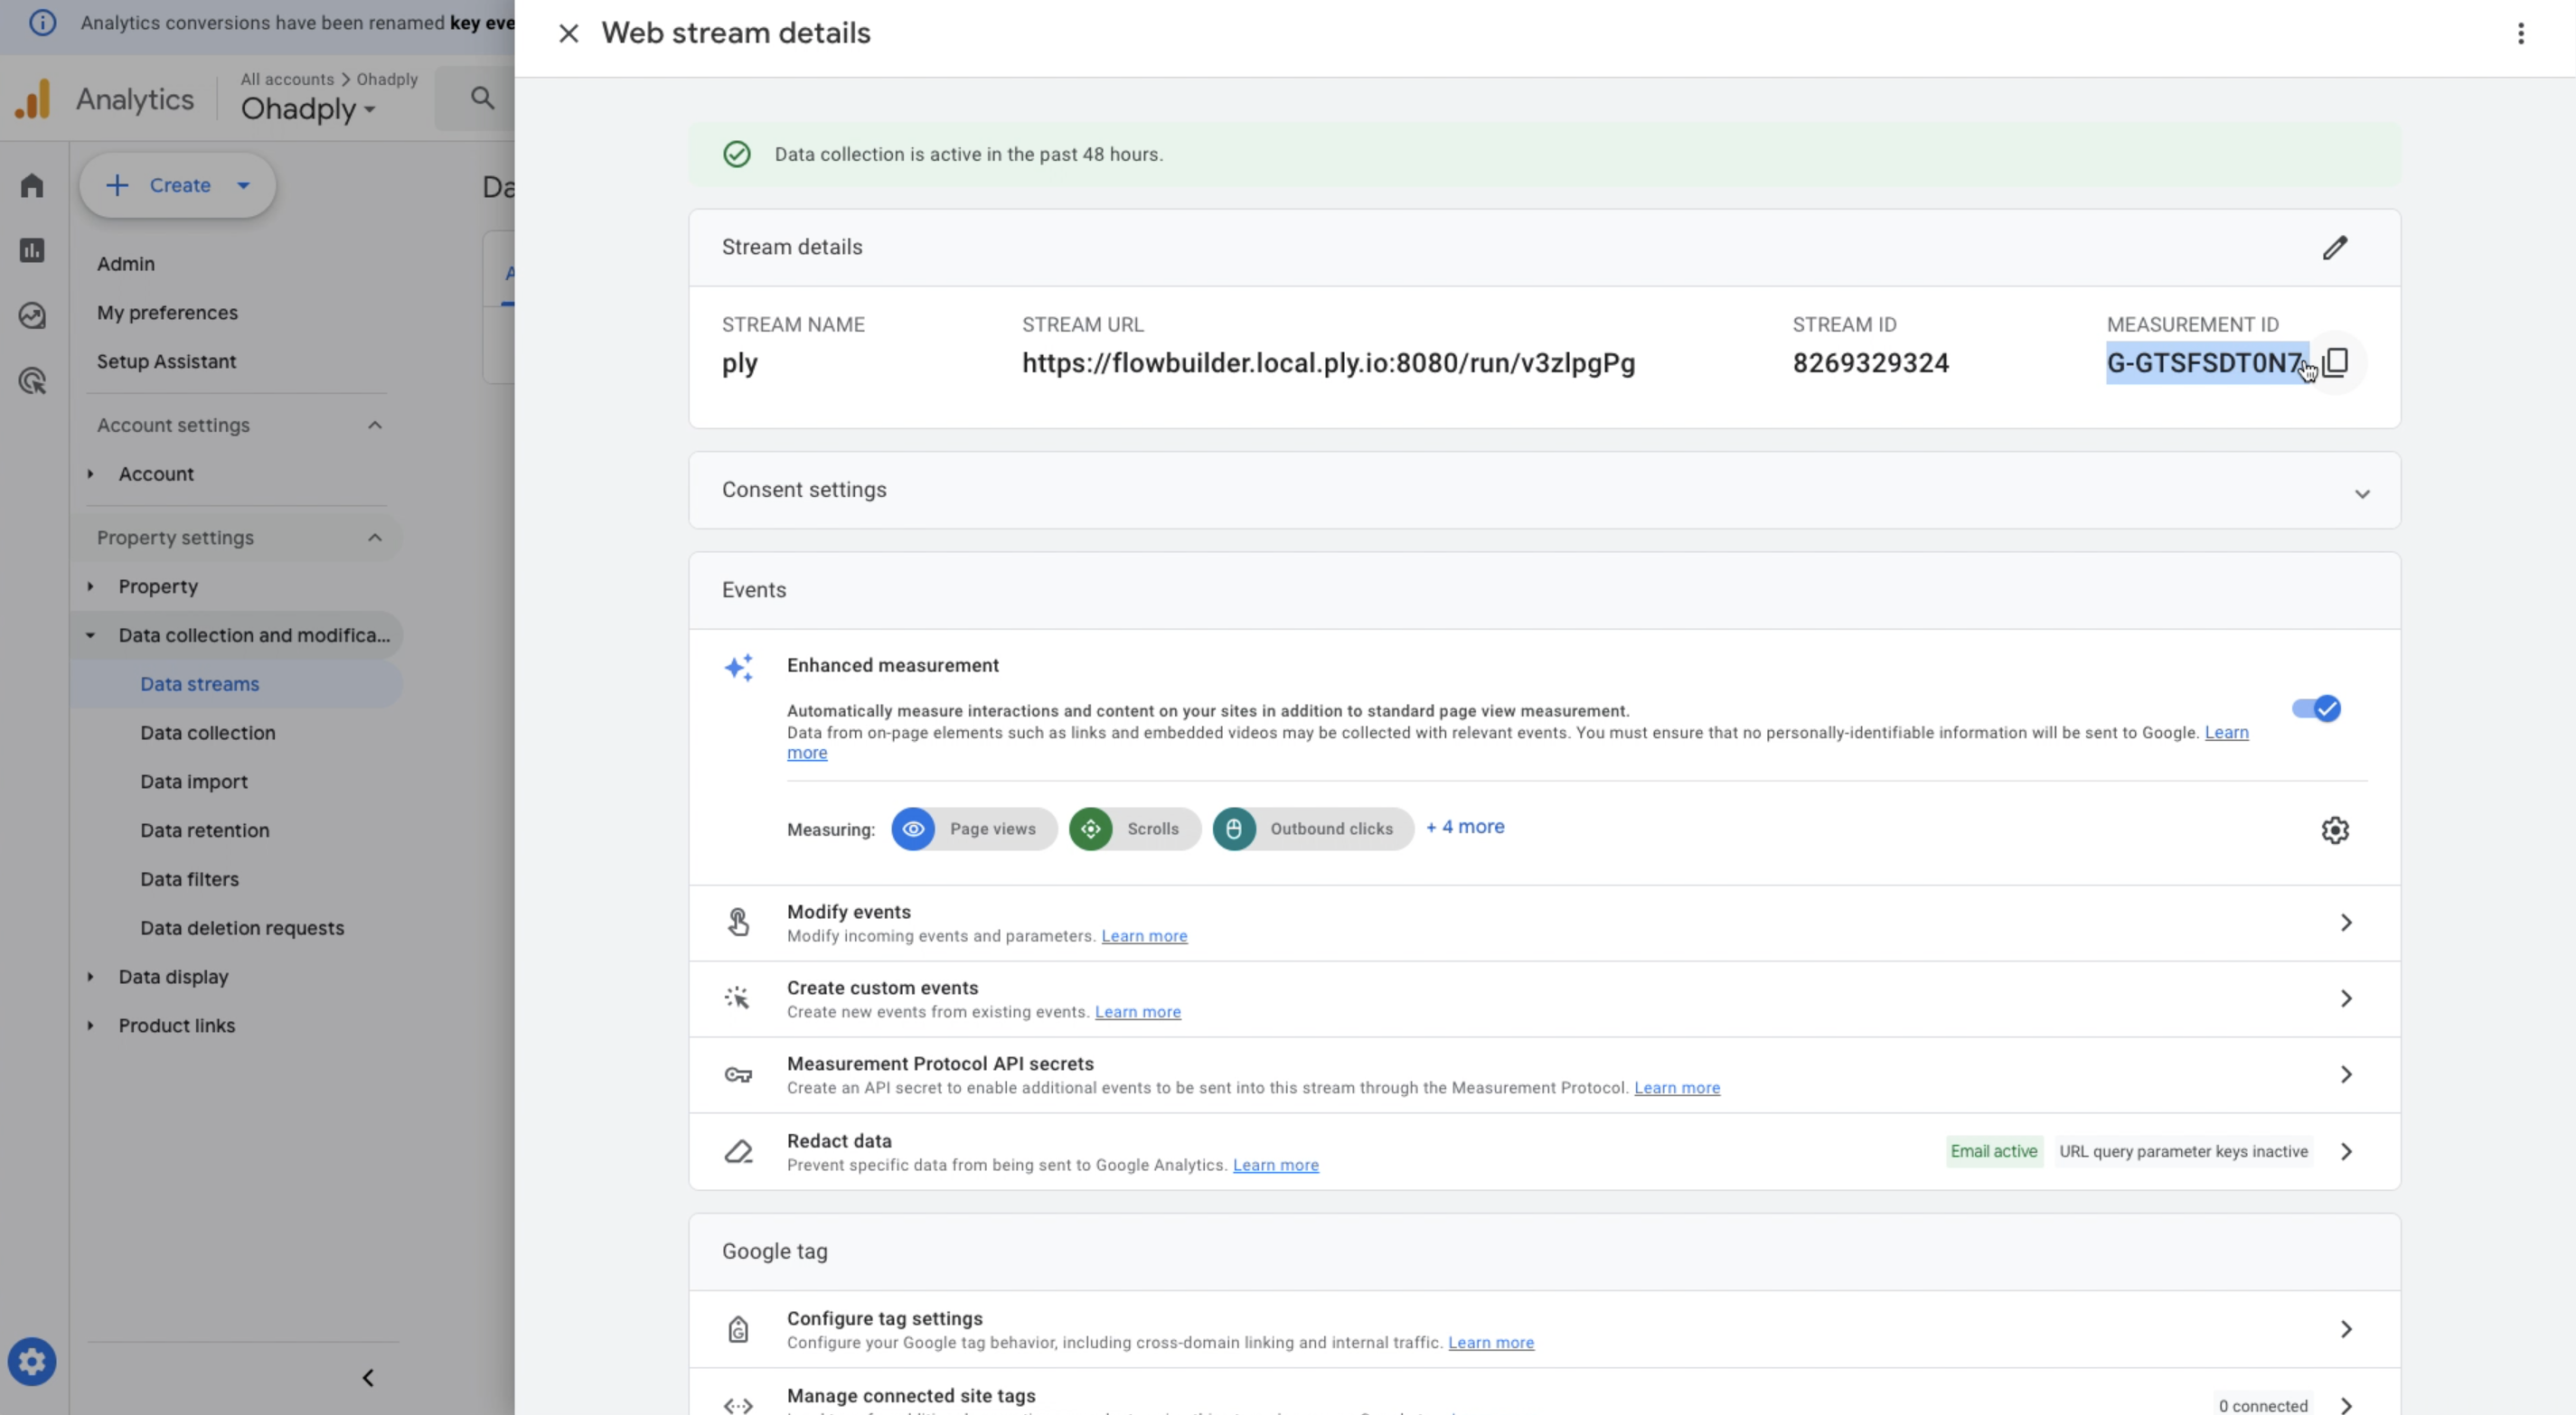
In the web stream setup, set the Website URL to your portal's run URL, either https://run.ply.io or to your custom domain for running portals
Save the new web stream and copy the Measurement ID into the tracking destination setup
Segment
Go to the Segment dashboard here
Open or create a Javascript website data source
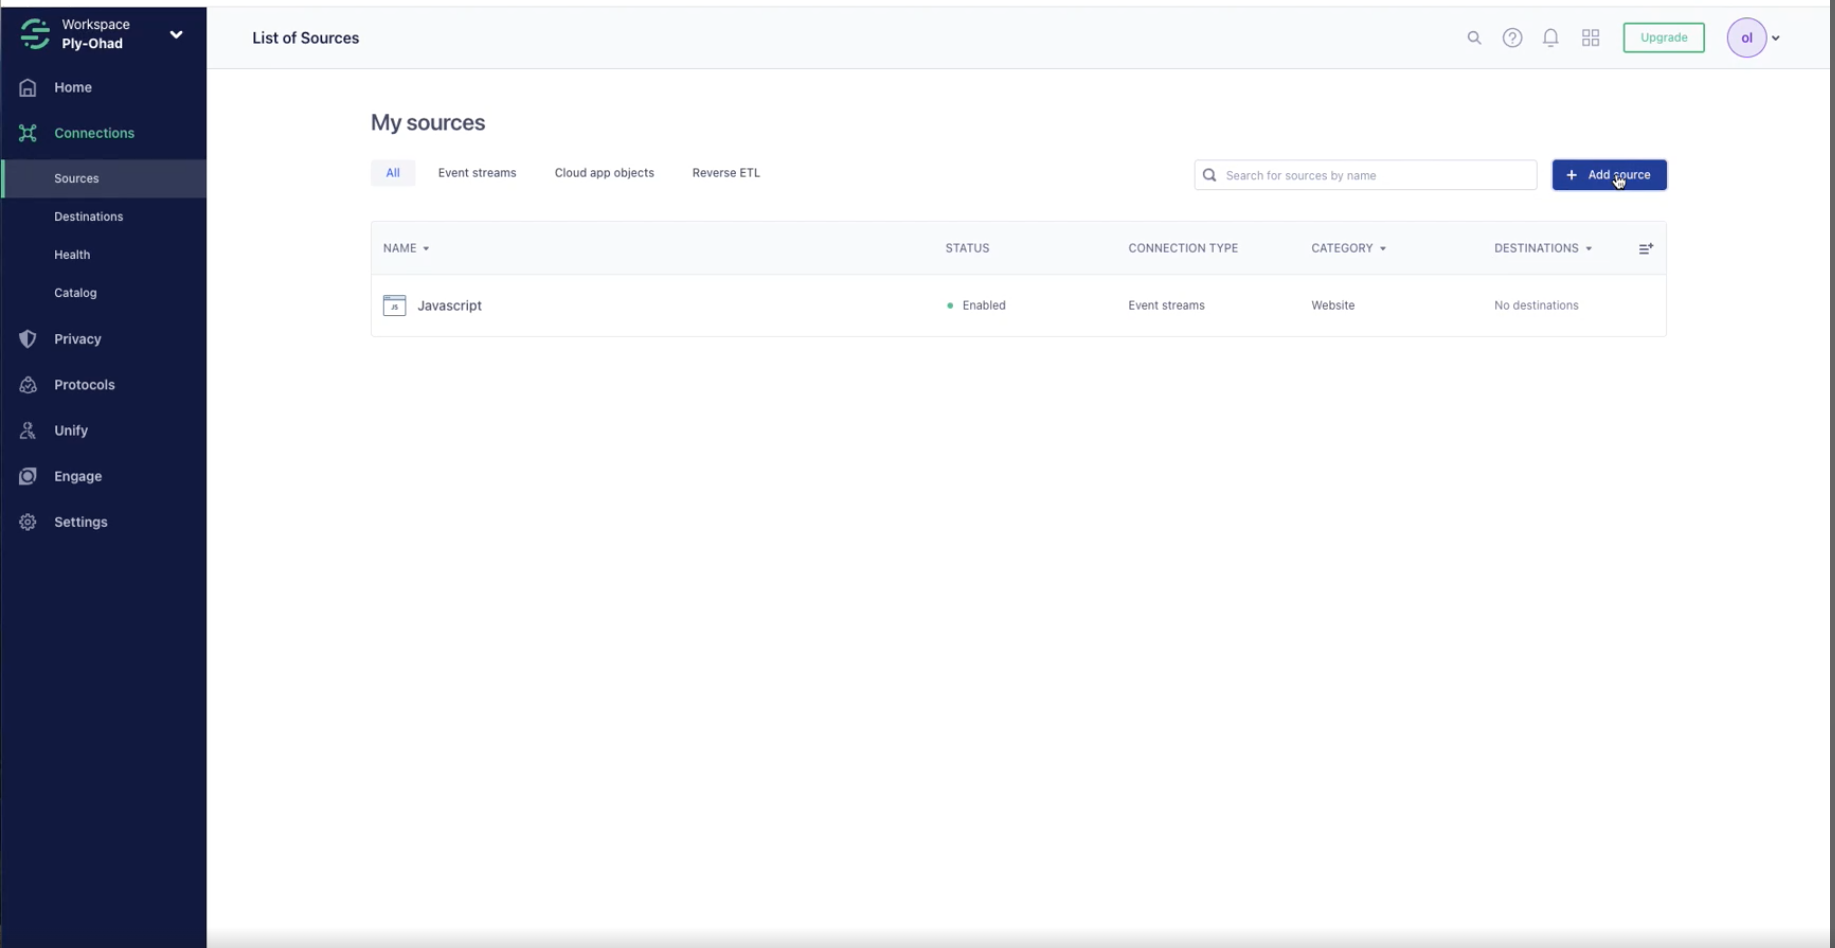
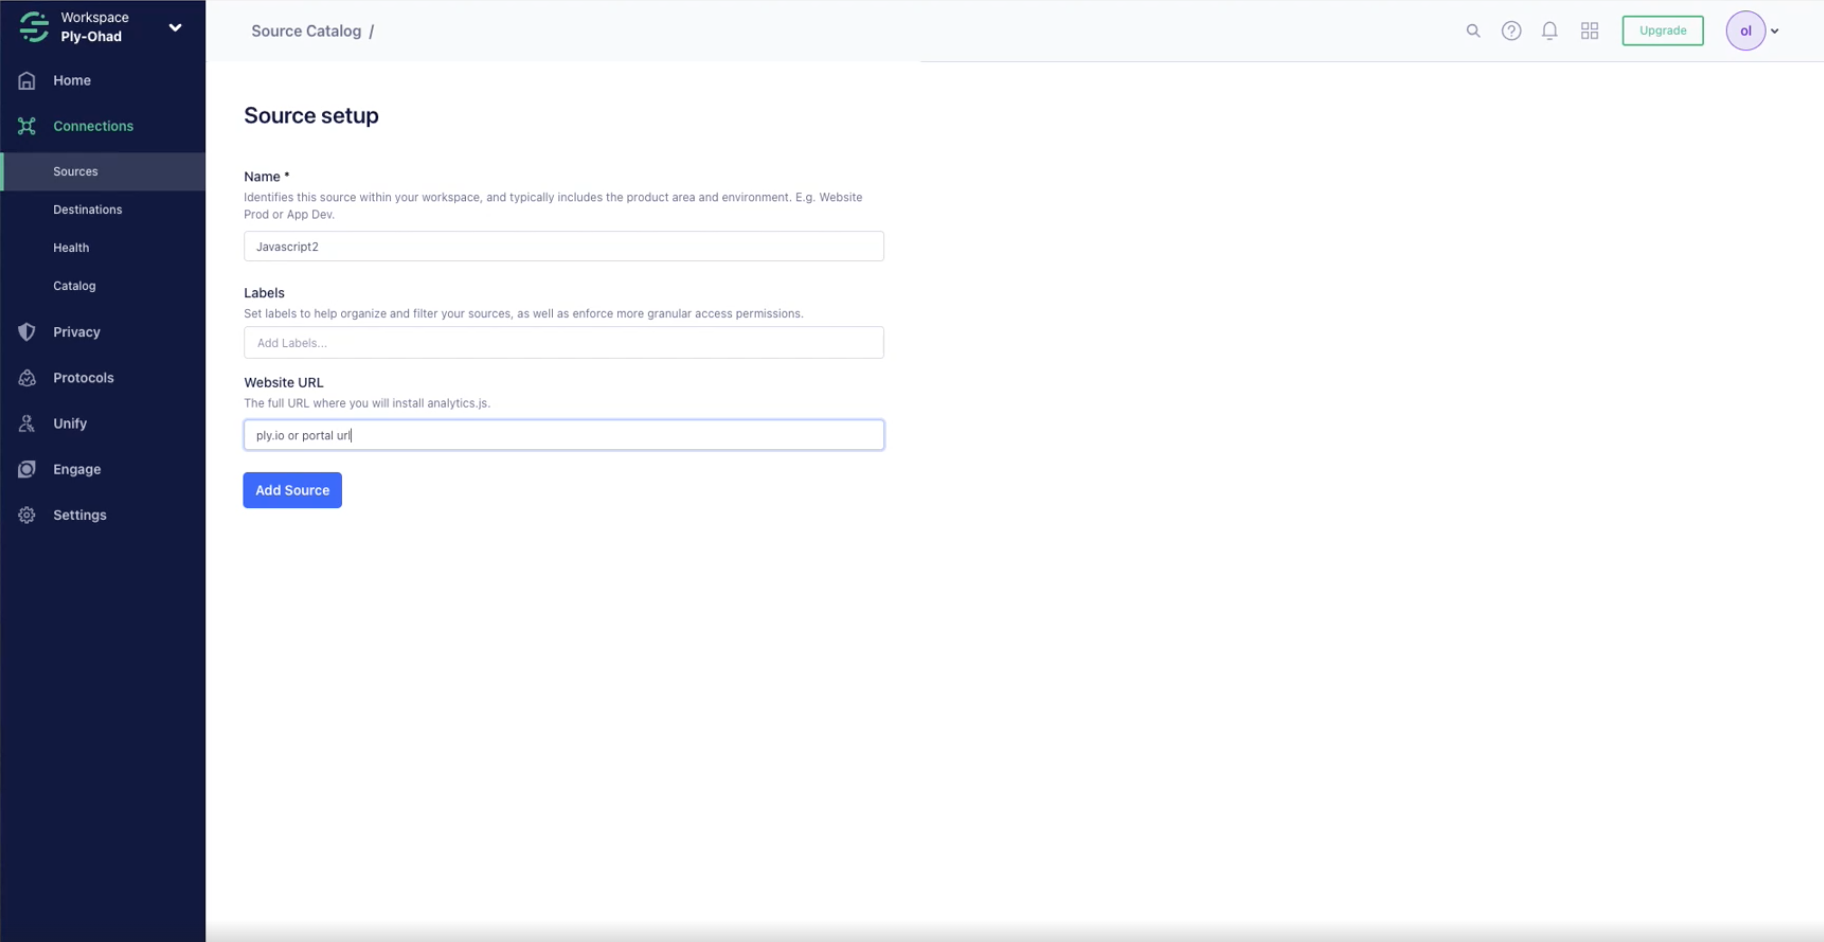
In the source setup, set the website URL to your portal's run URL, either https://run.ply.io or to your custom domain for running portals
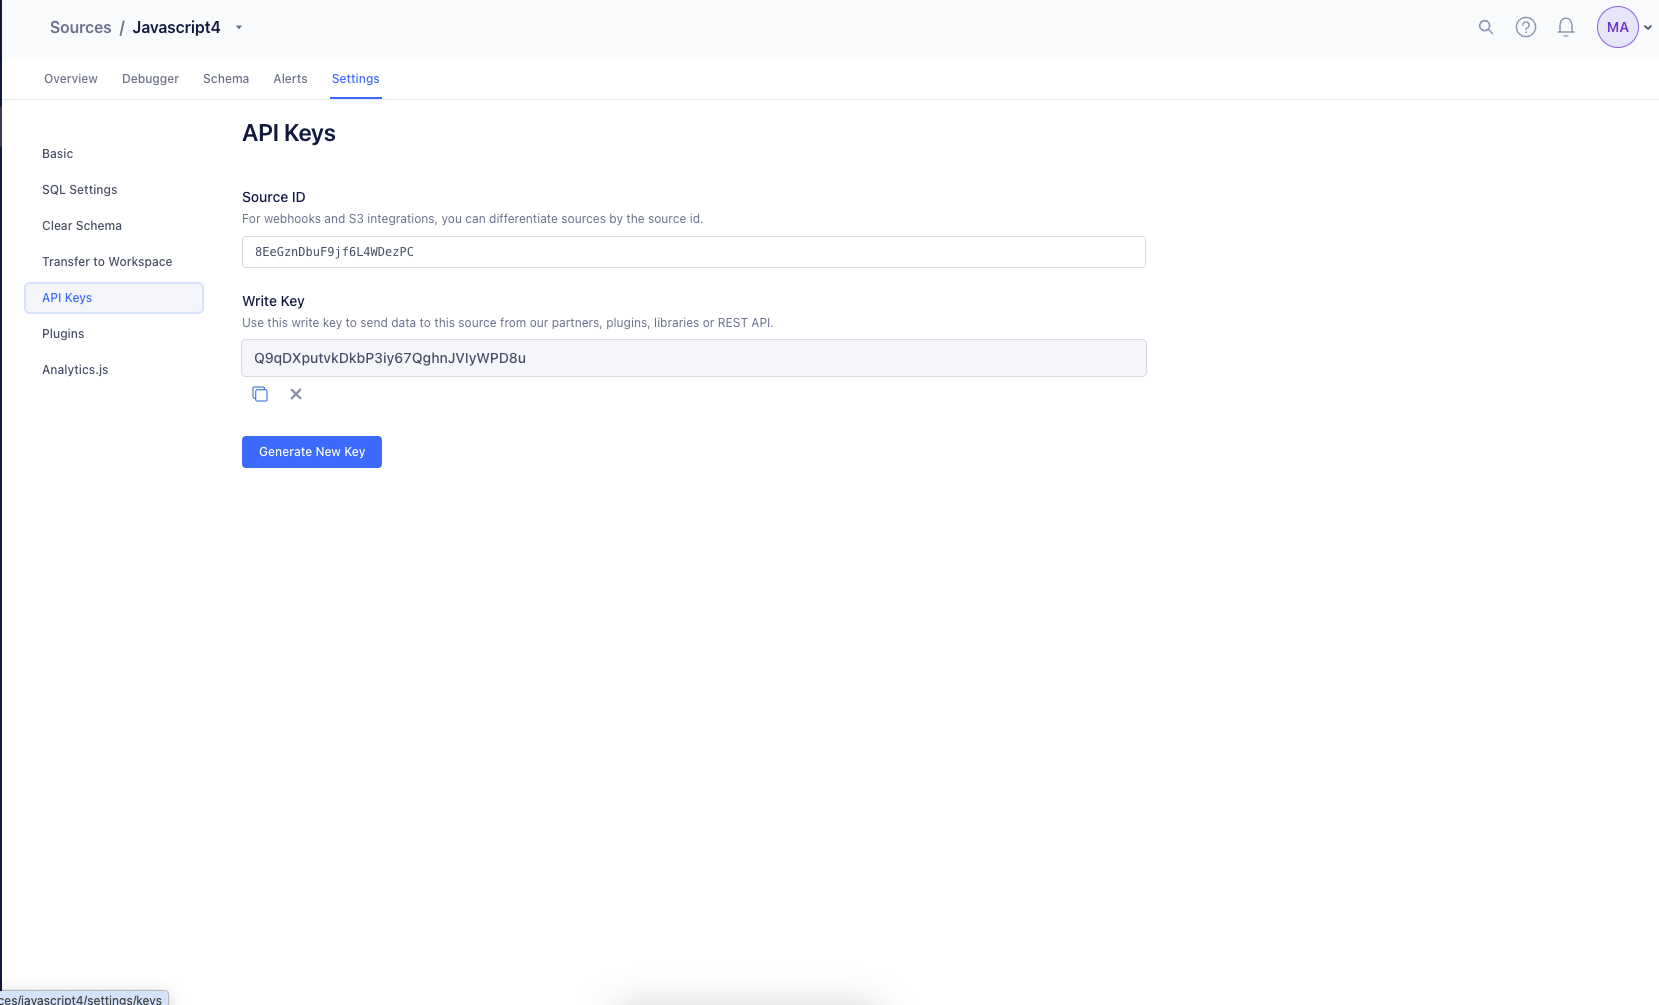
From the source settings, go to API Keys and copy the Write Key into the destination setup
Amplitude
From the dashboard, click on the data tab on the left
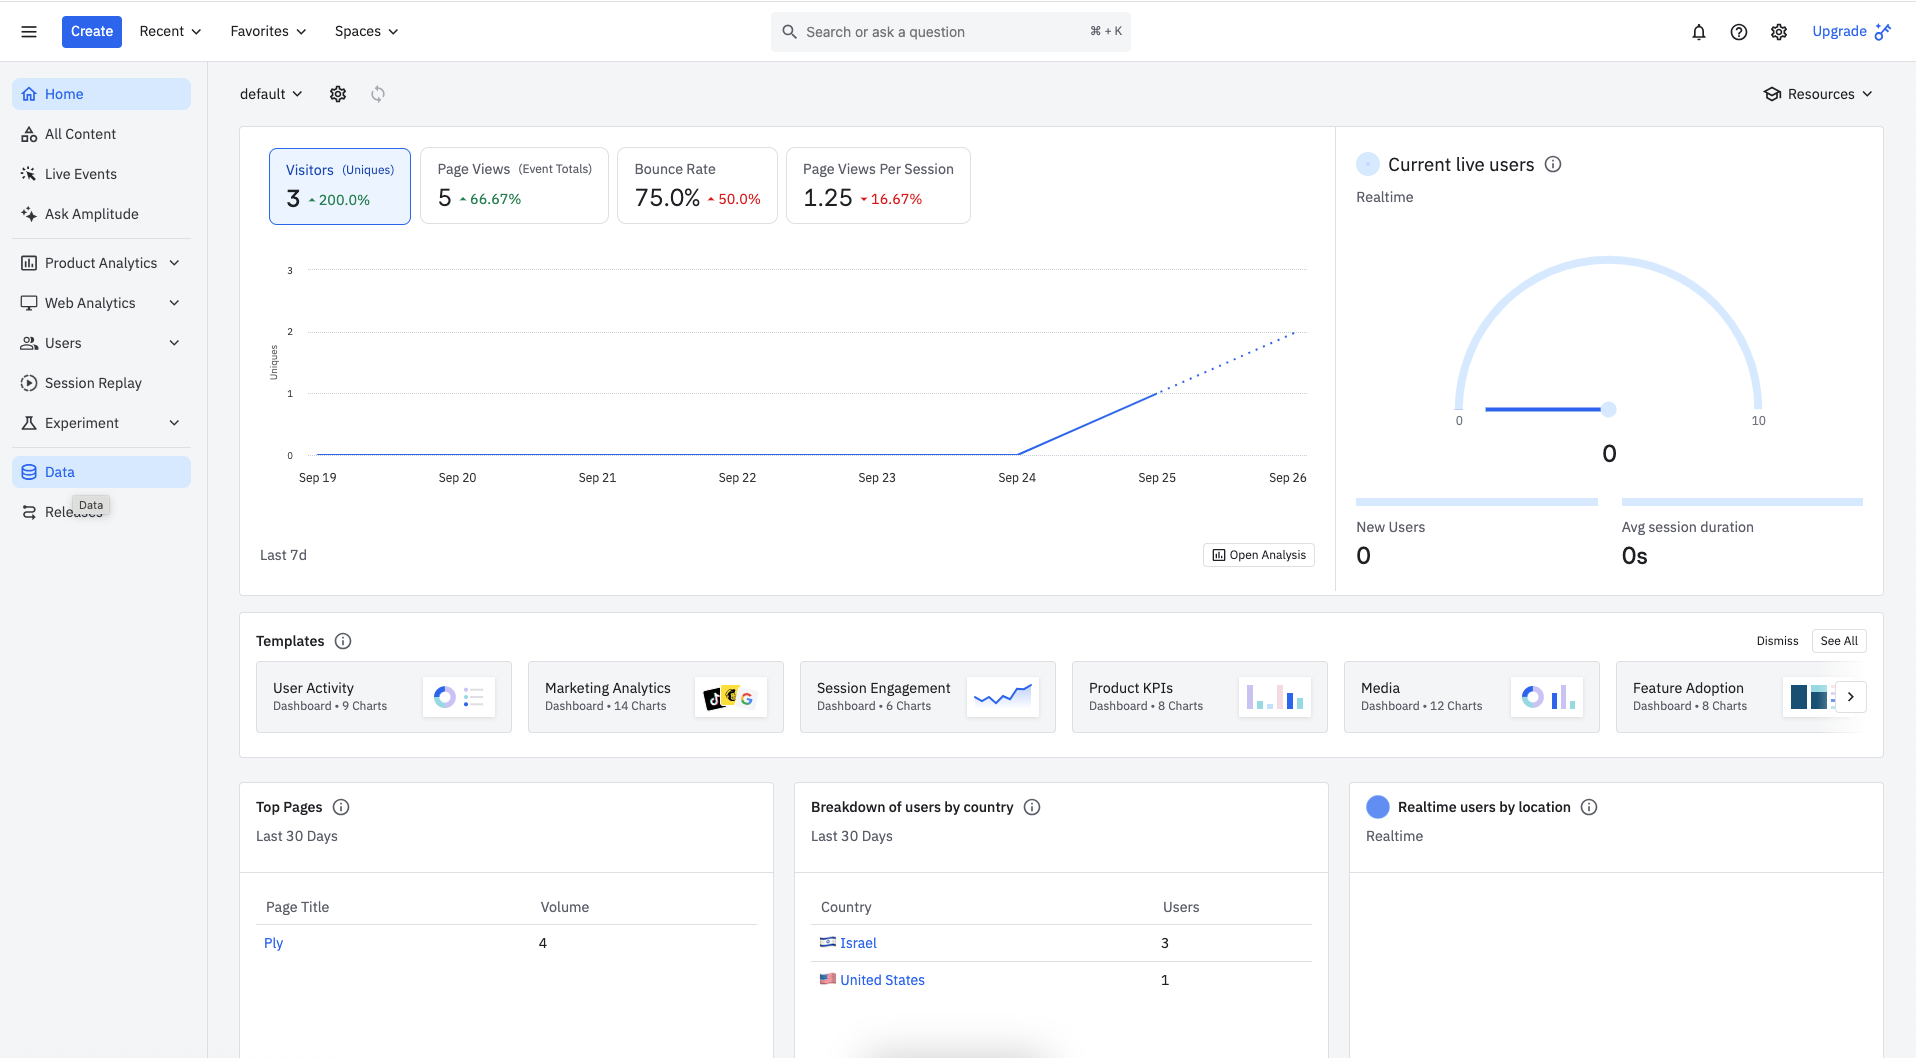
Open the sources tab
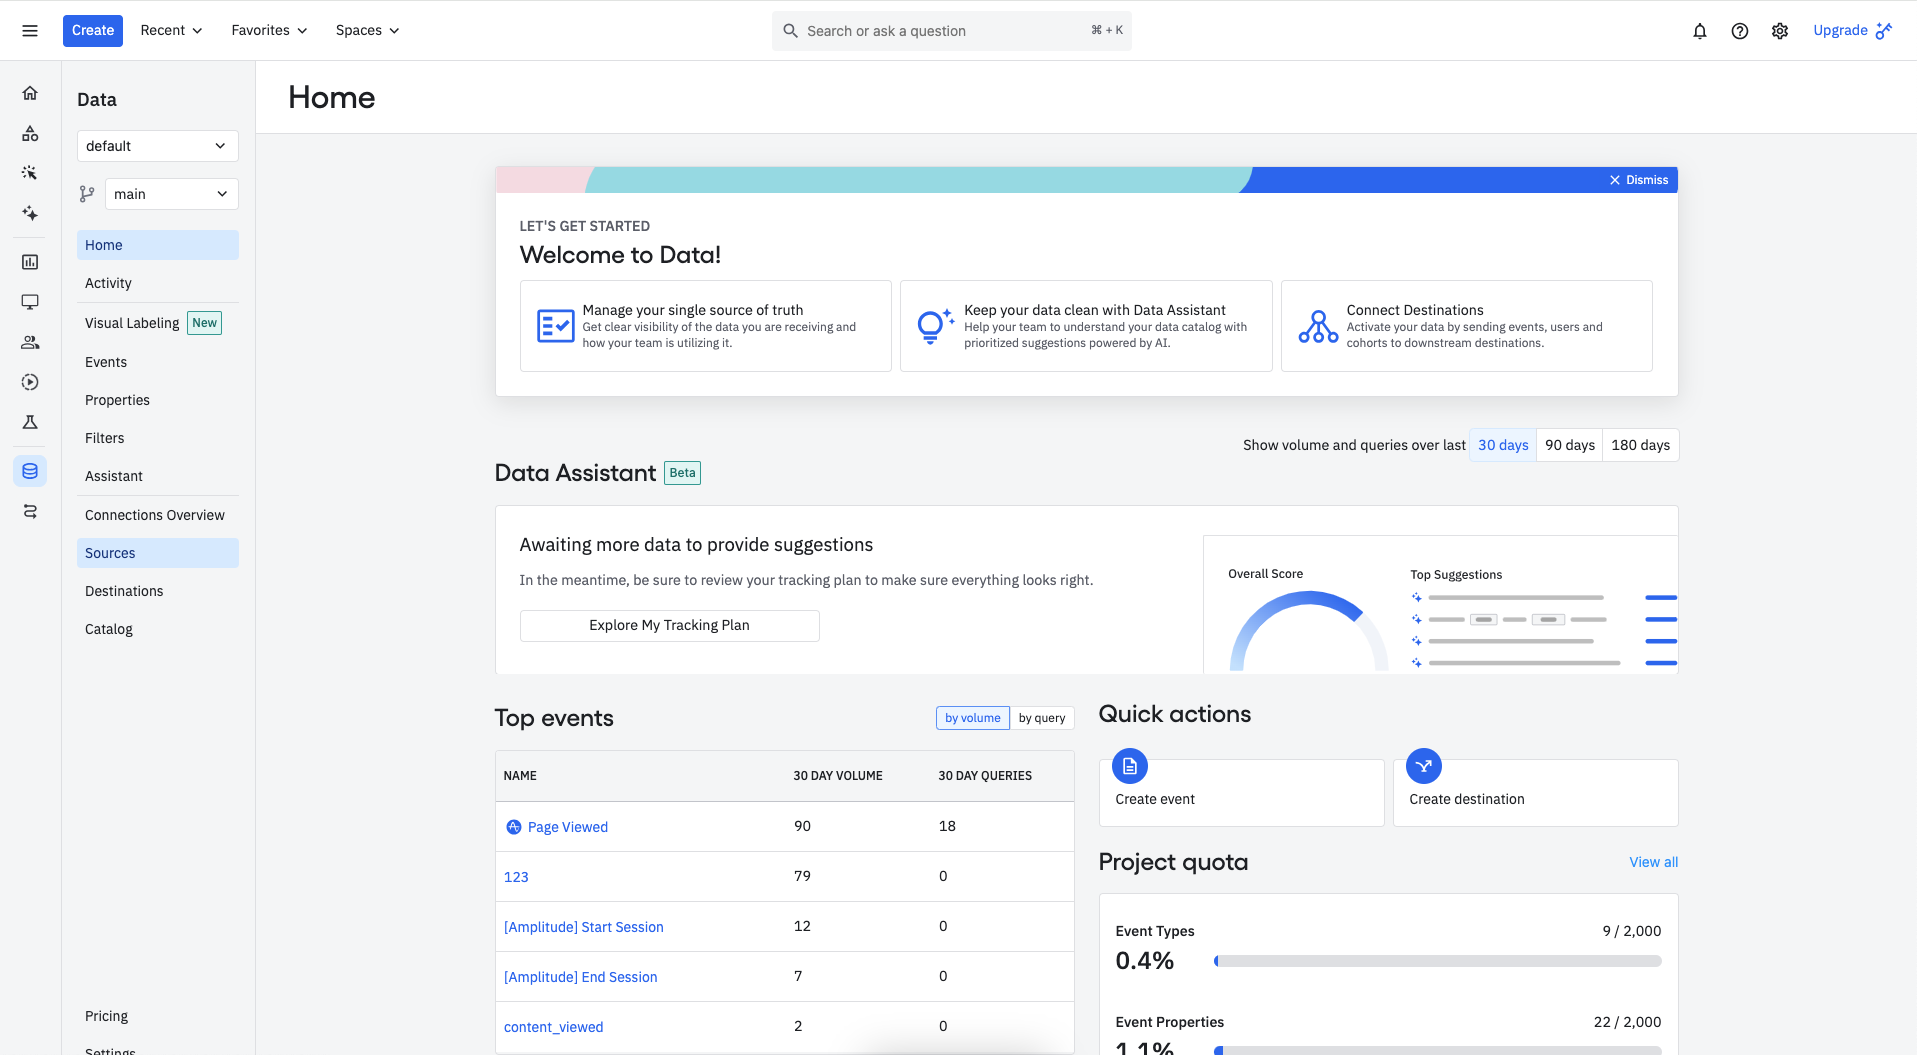
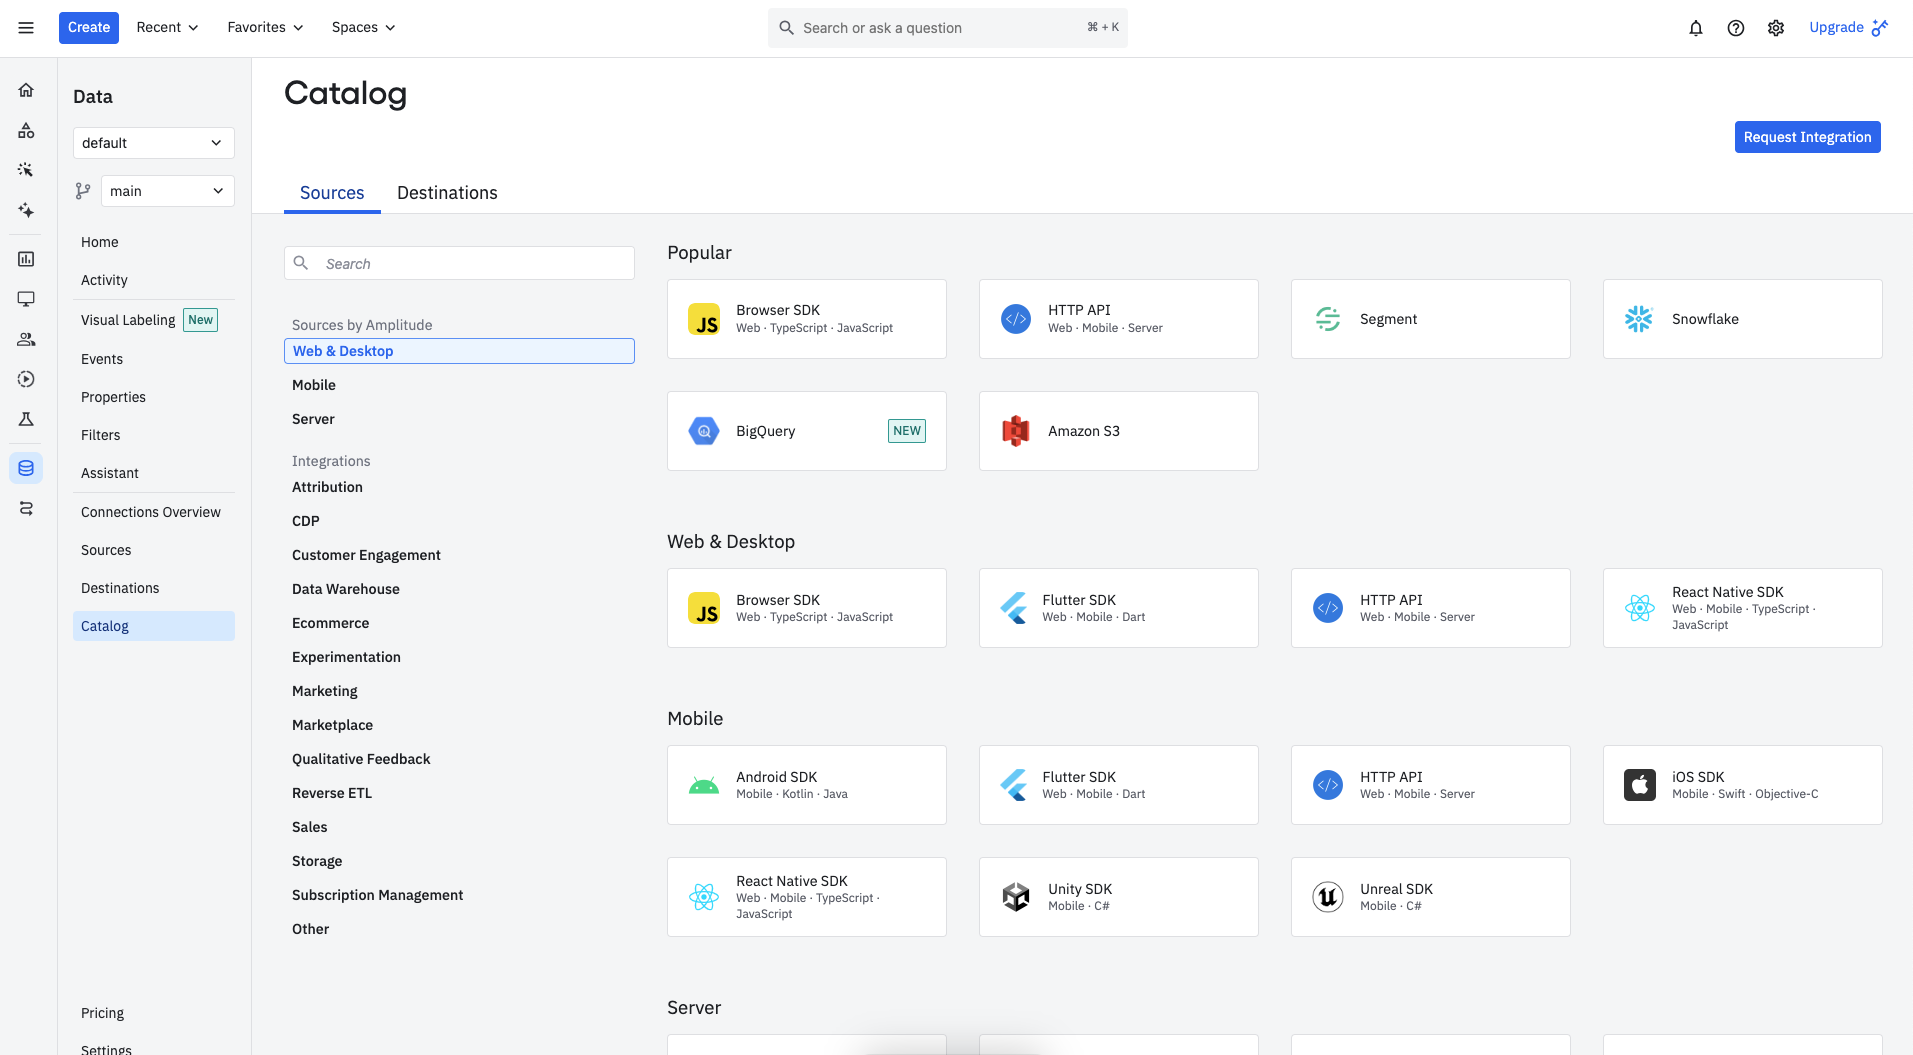
Create a new source whose type is Browser SDK
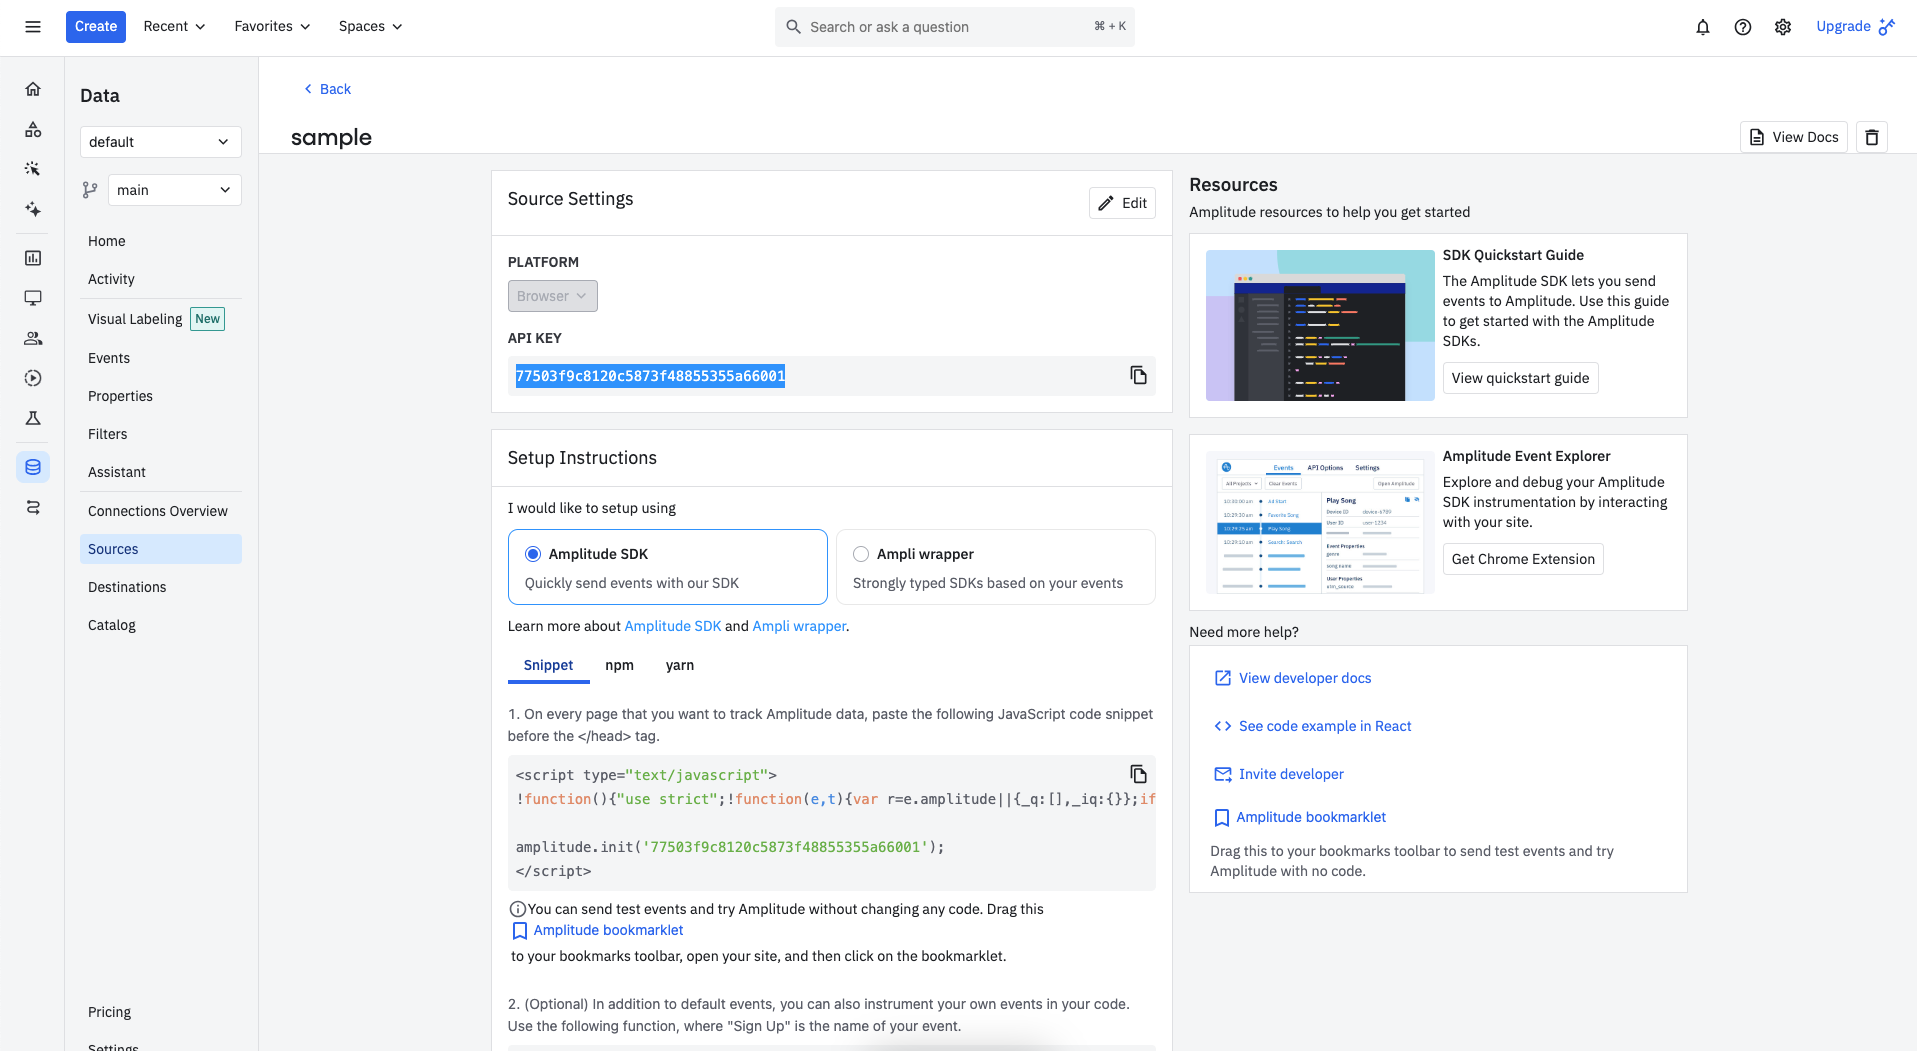
Copy the source API key into the Ply destination settings
Customer.io
Go to Account settings (top-right settings button when logged in)
Go to API Credentials
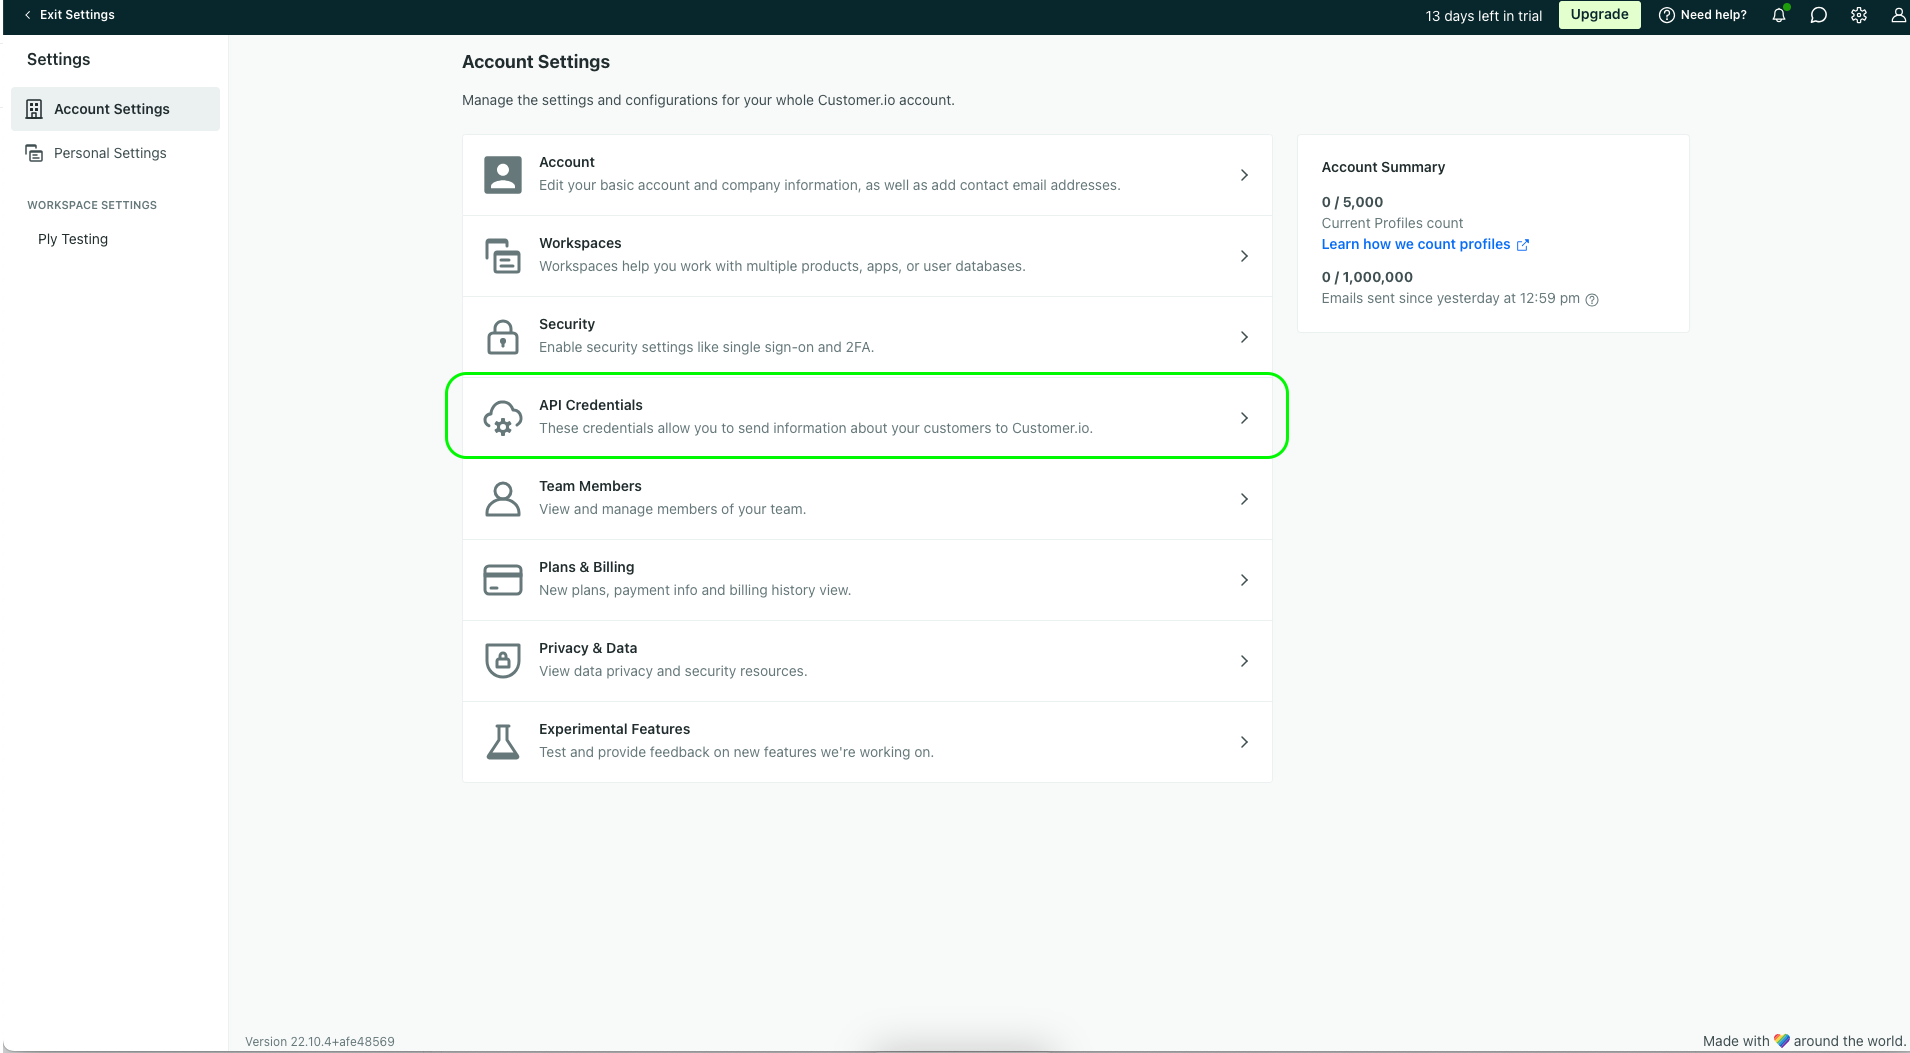
Create a track API key and copy its site ID
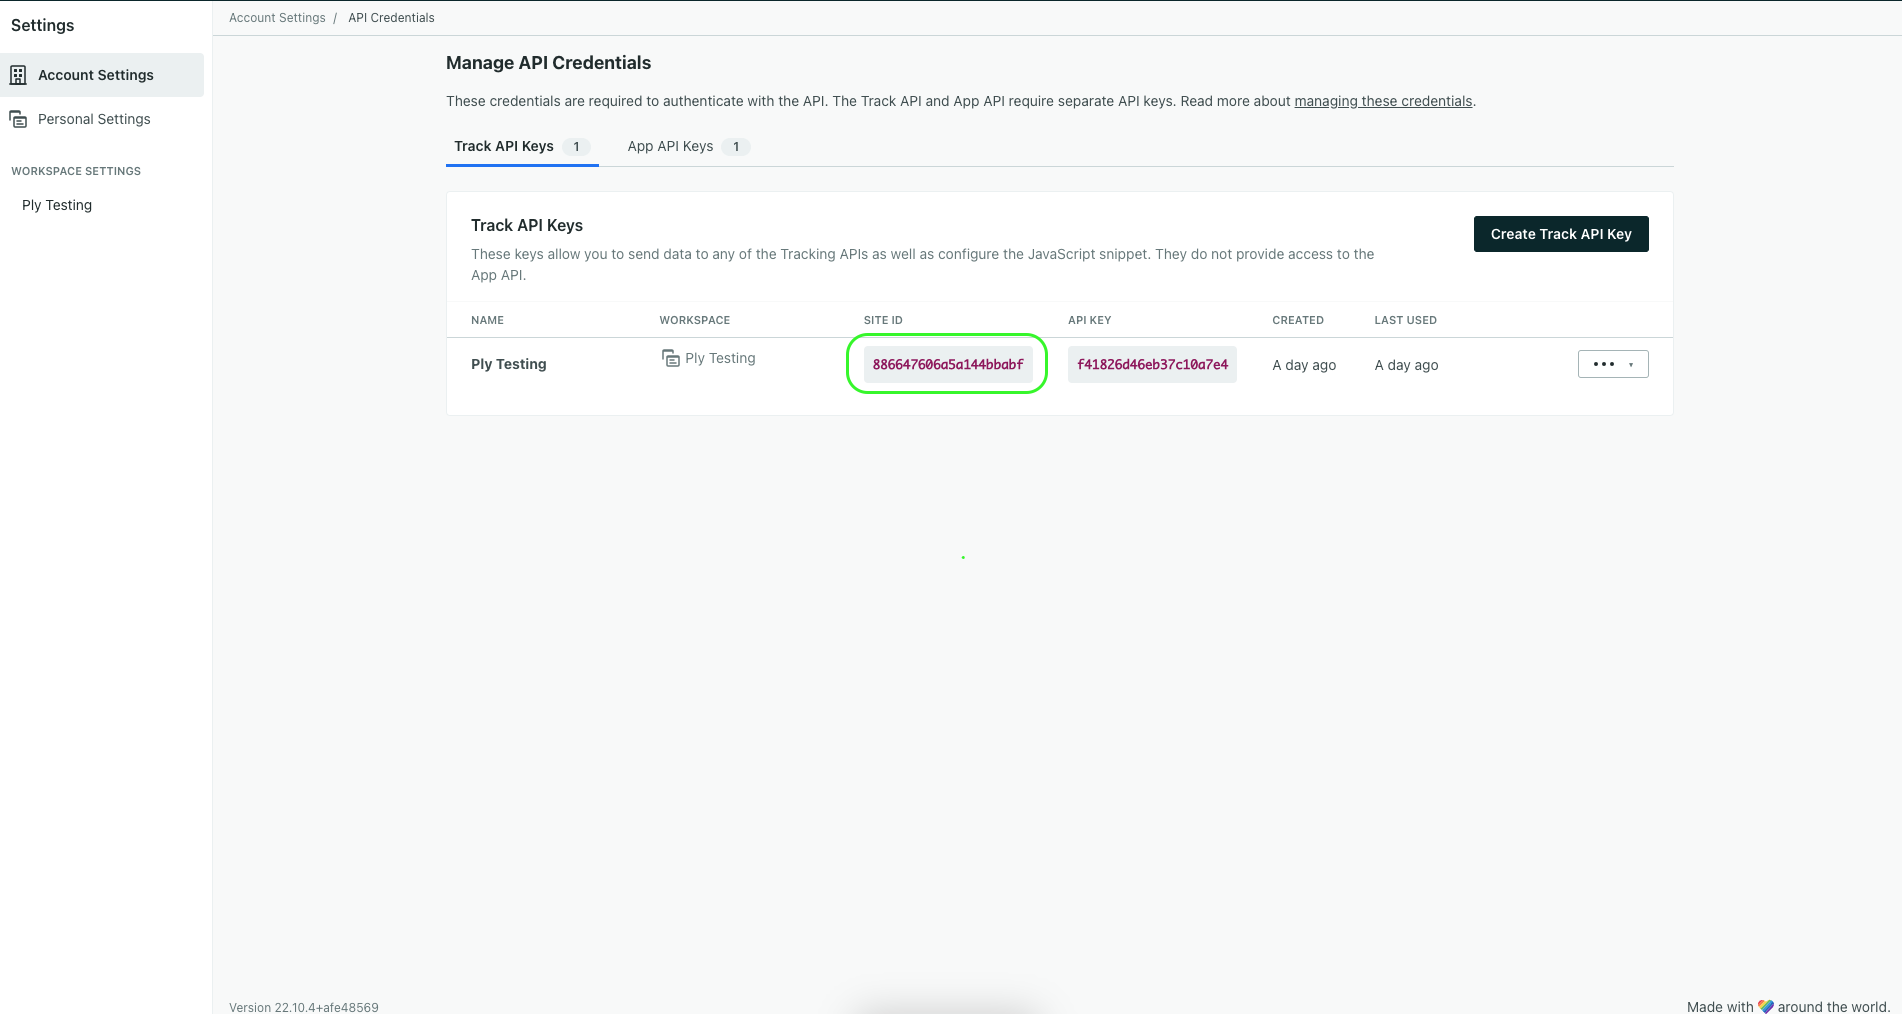
Paste the site ID into the Ply destination settings
TikTok
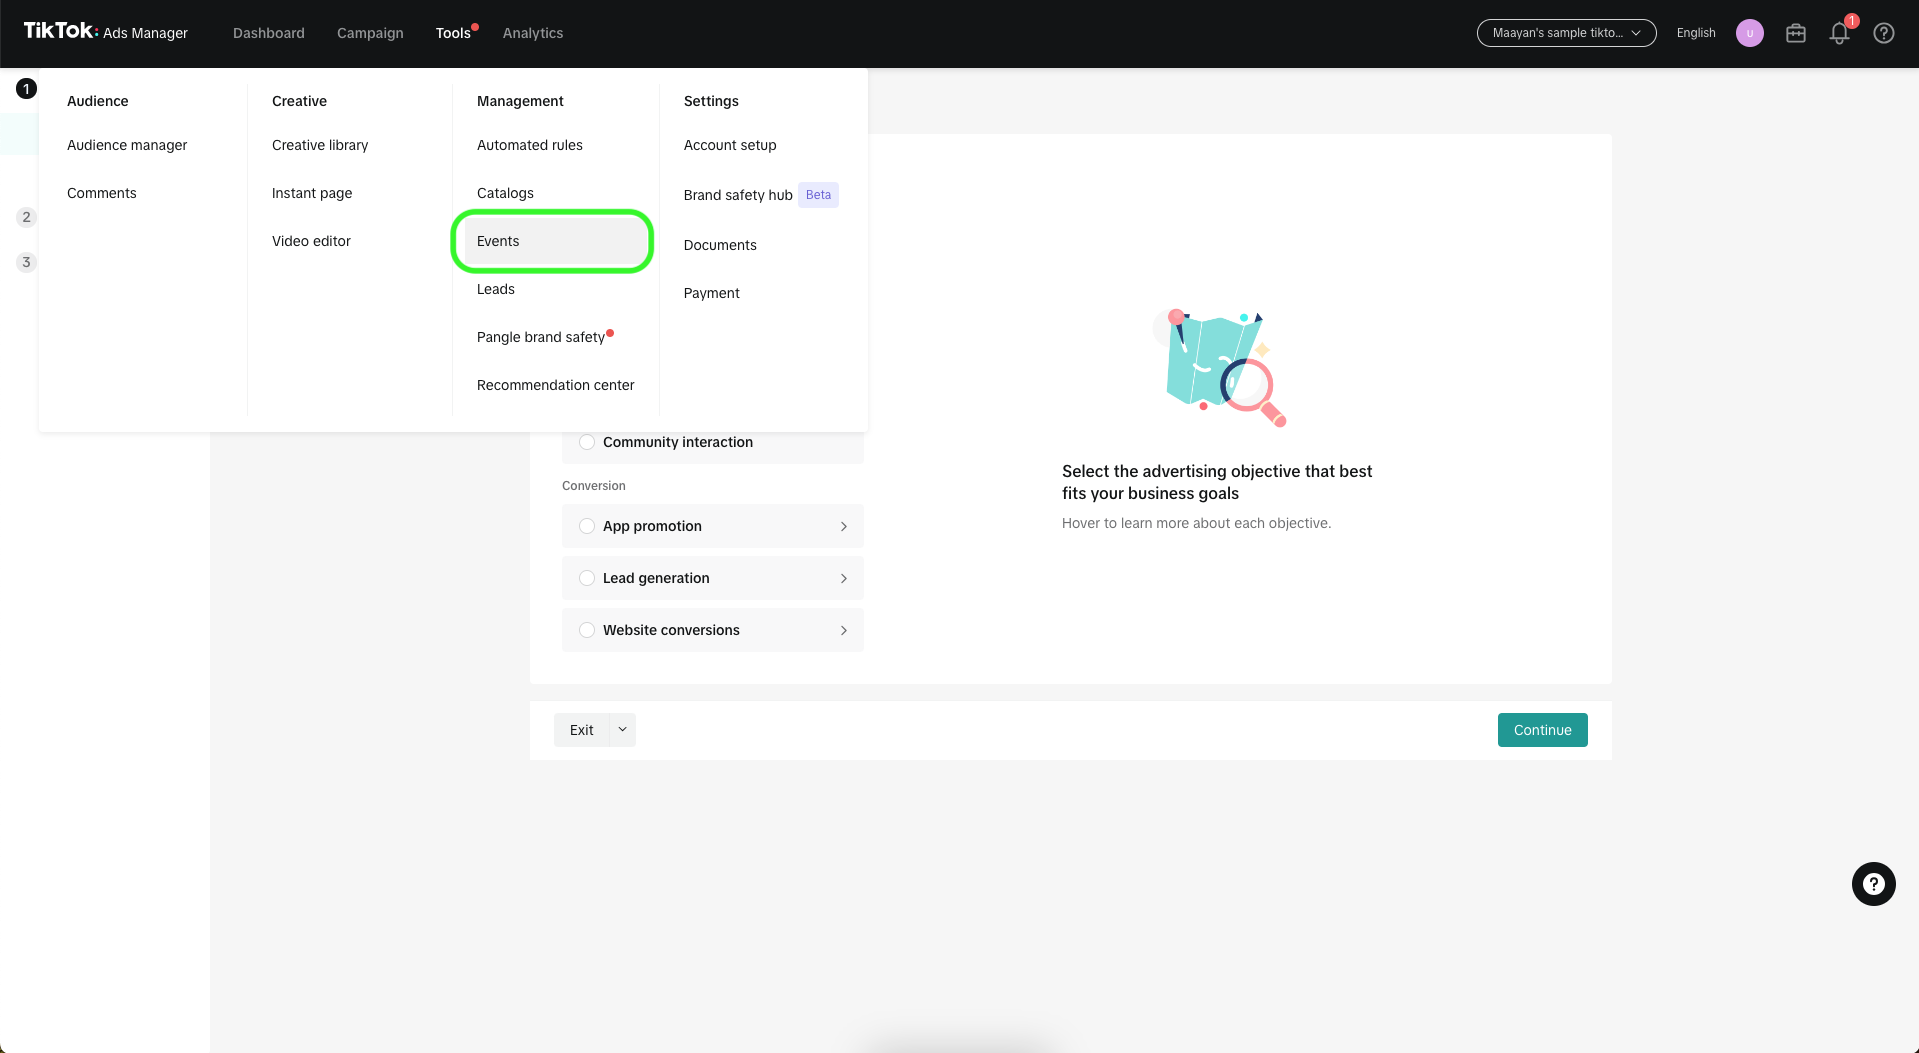
In TikTok ads managers, click Tools > Events
From the left panel, create a new web data source
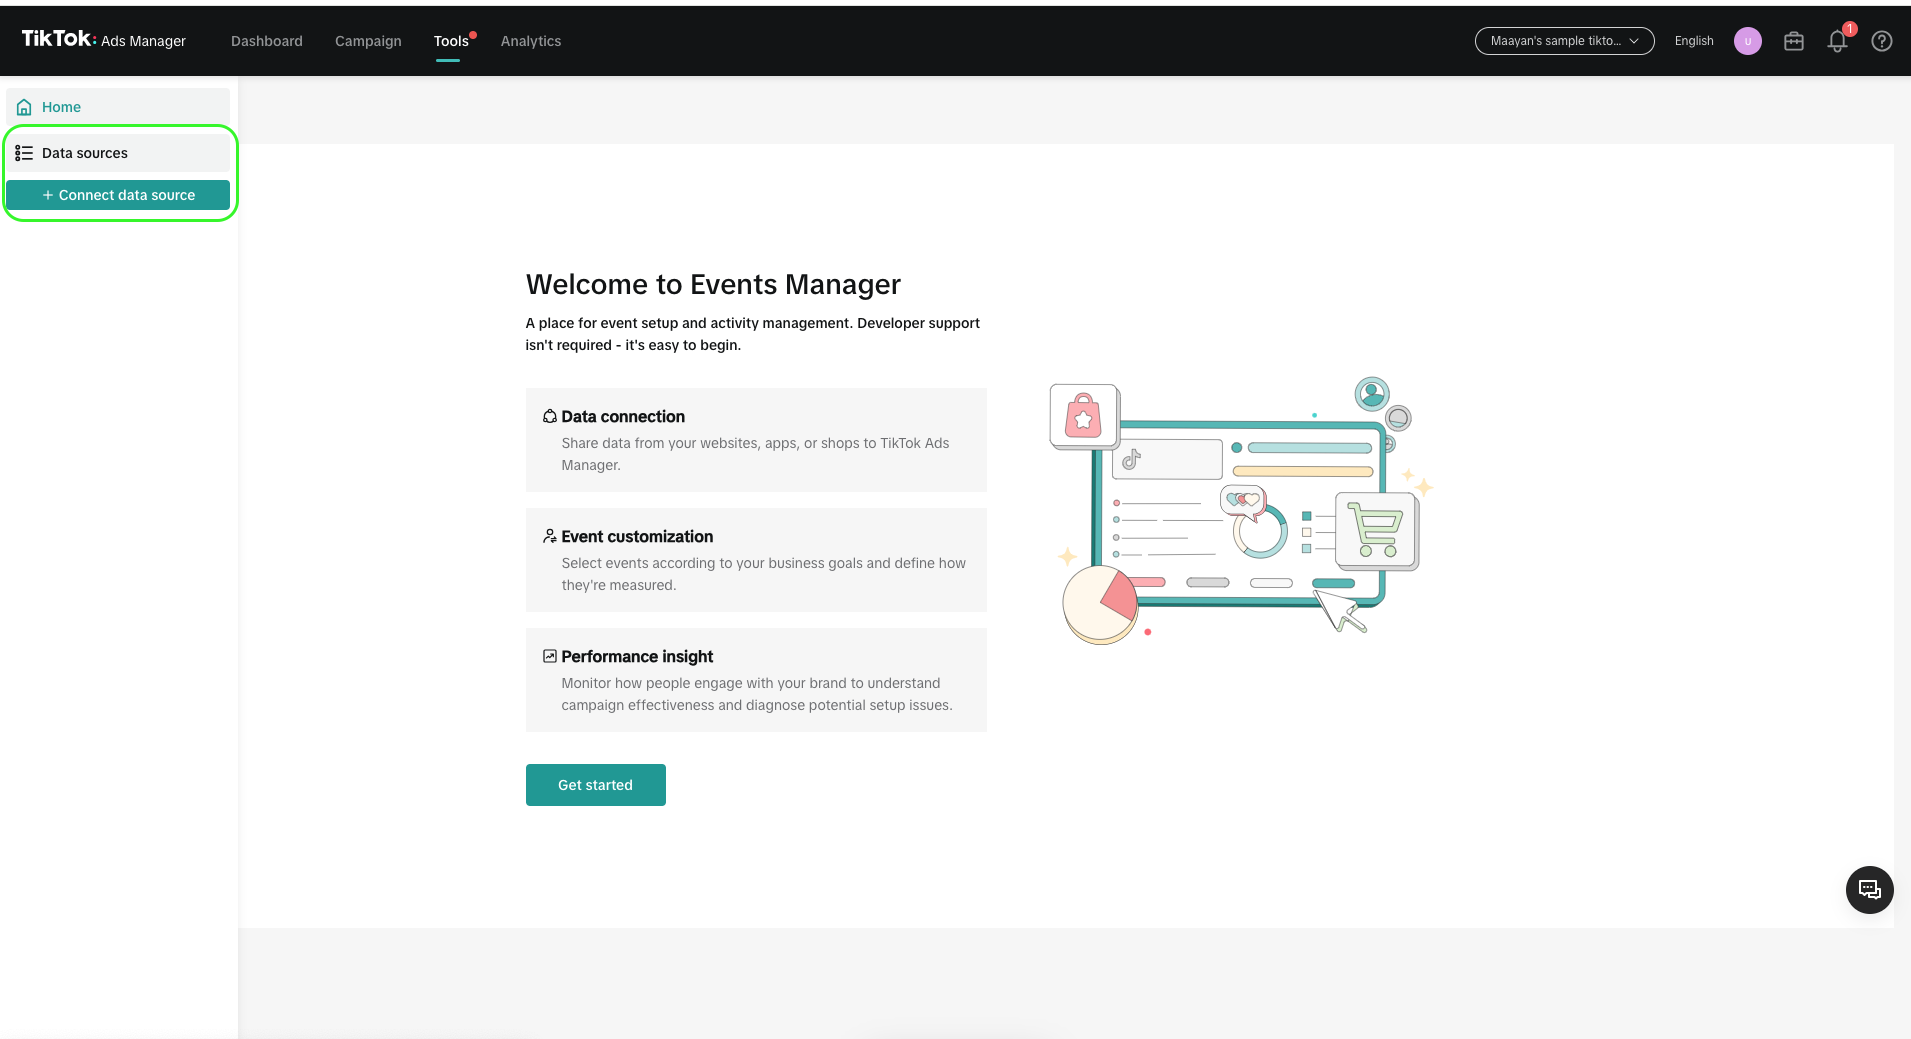
When prompted, set the website URL to your portal's run URL, either https://run.ply.io or to your custom domain for running portals
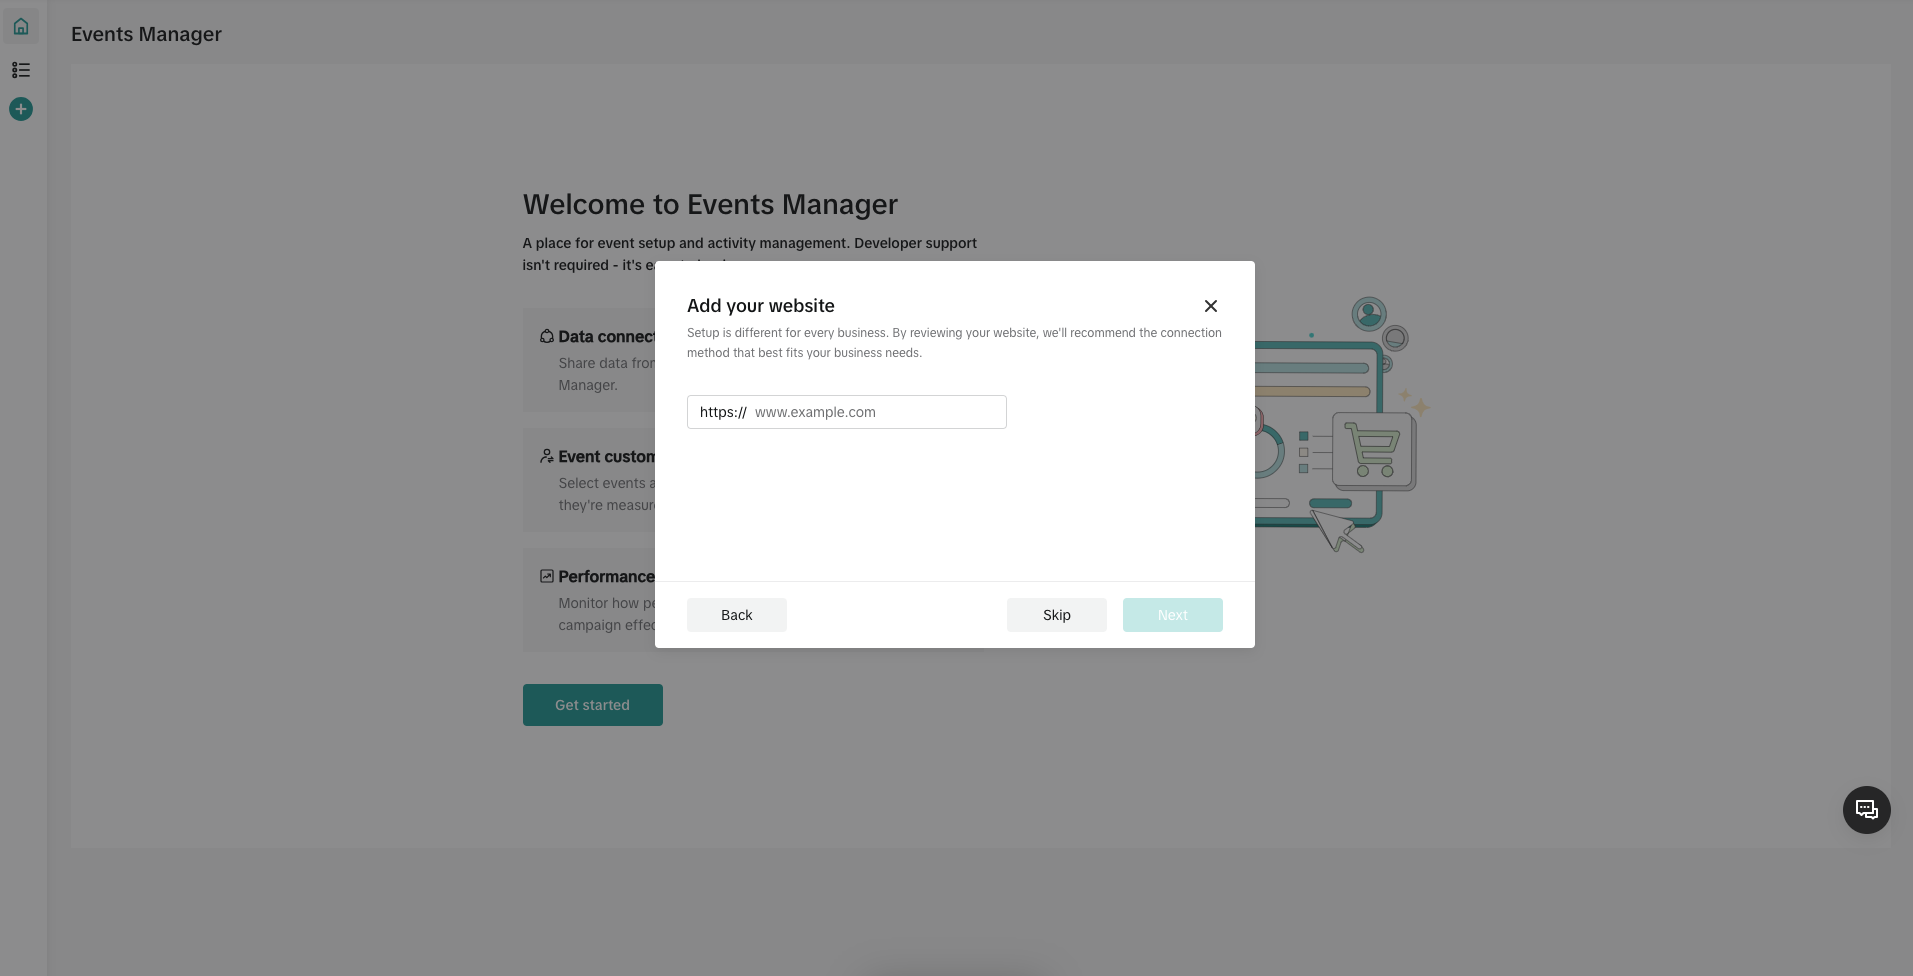
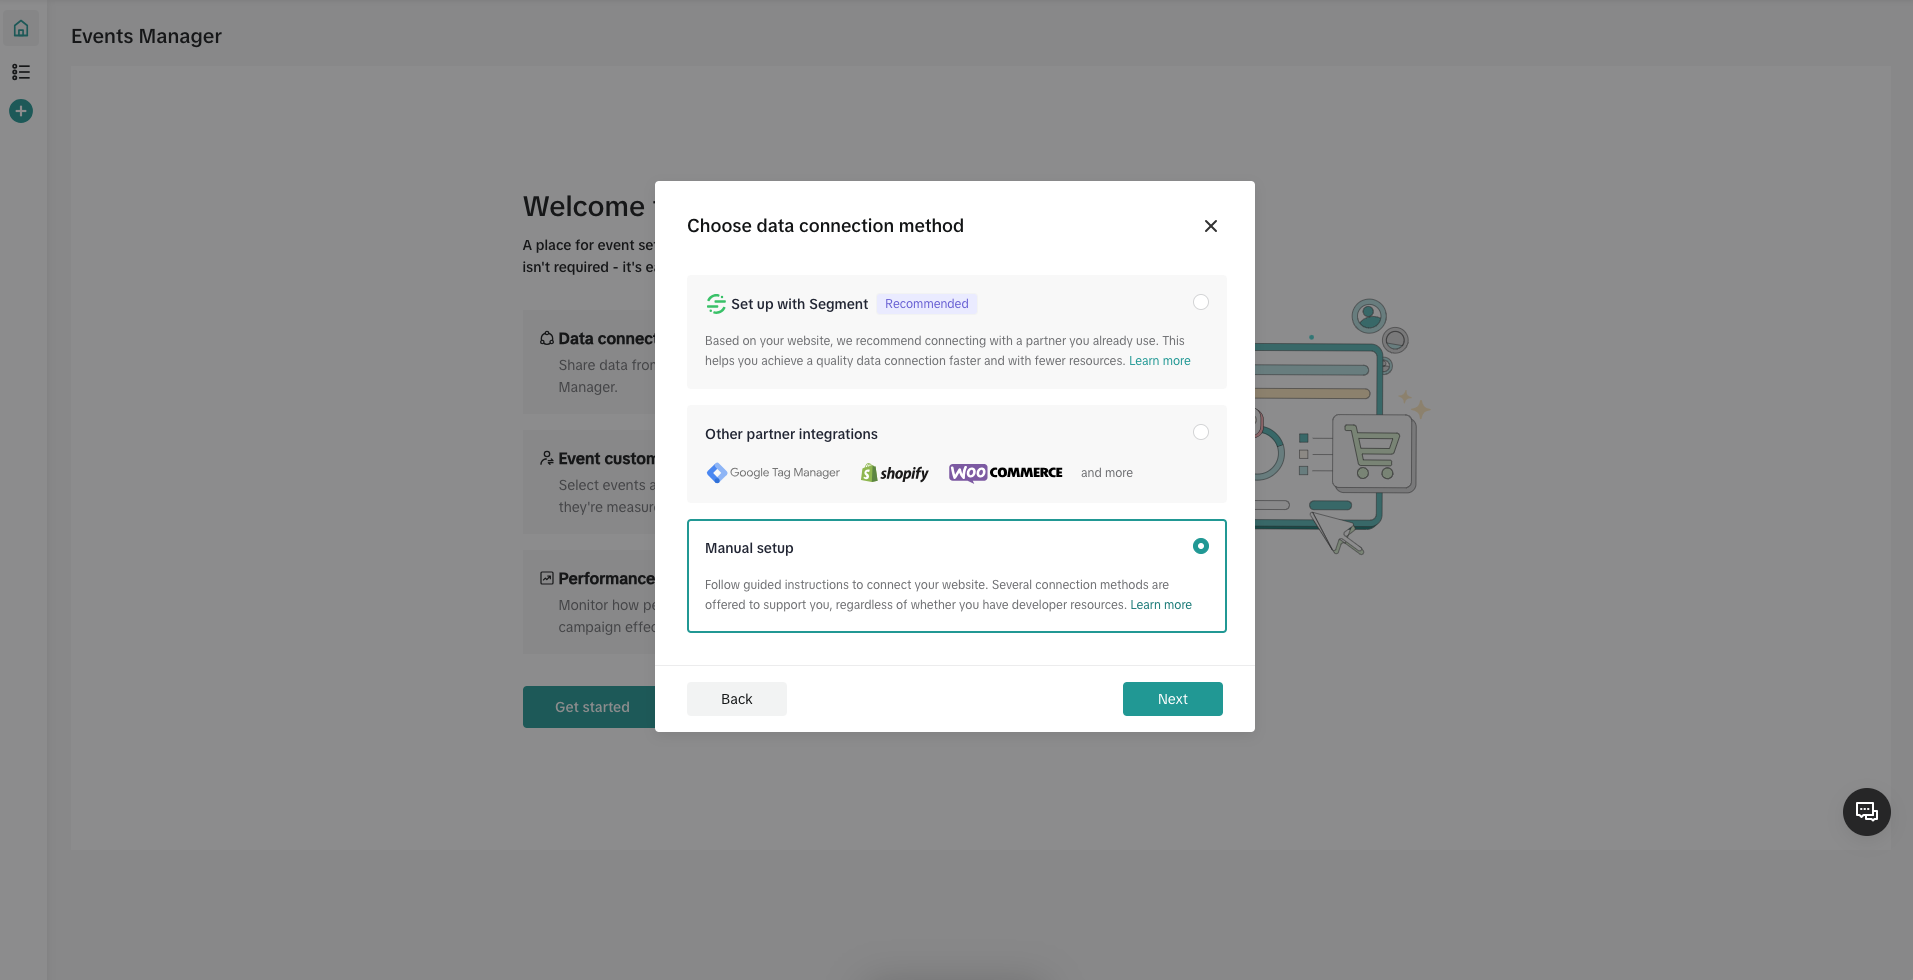
When asked, choose Manual setup for the connection method
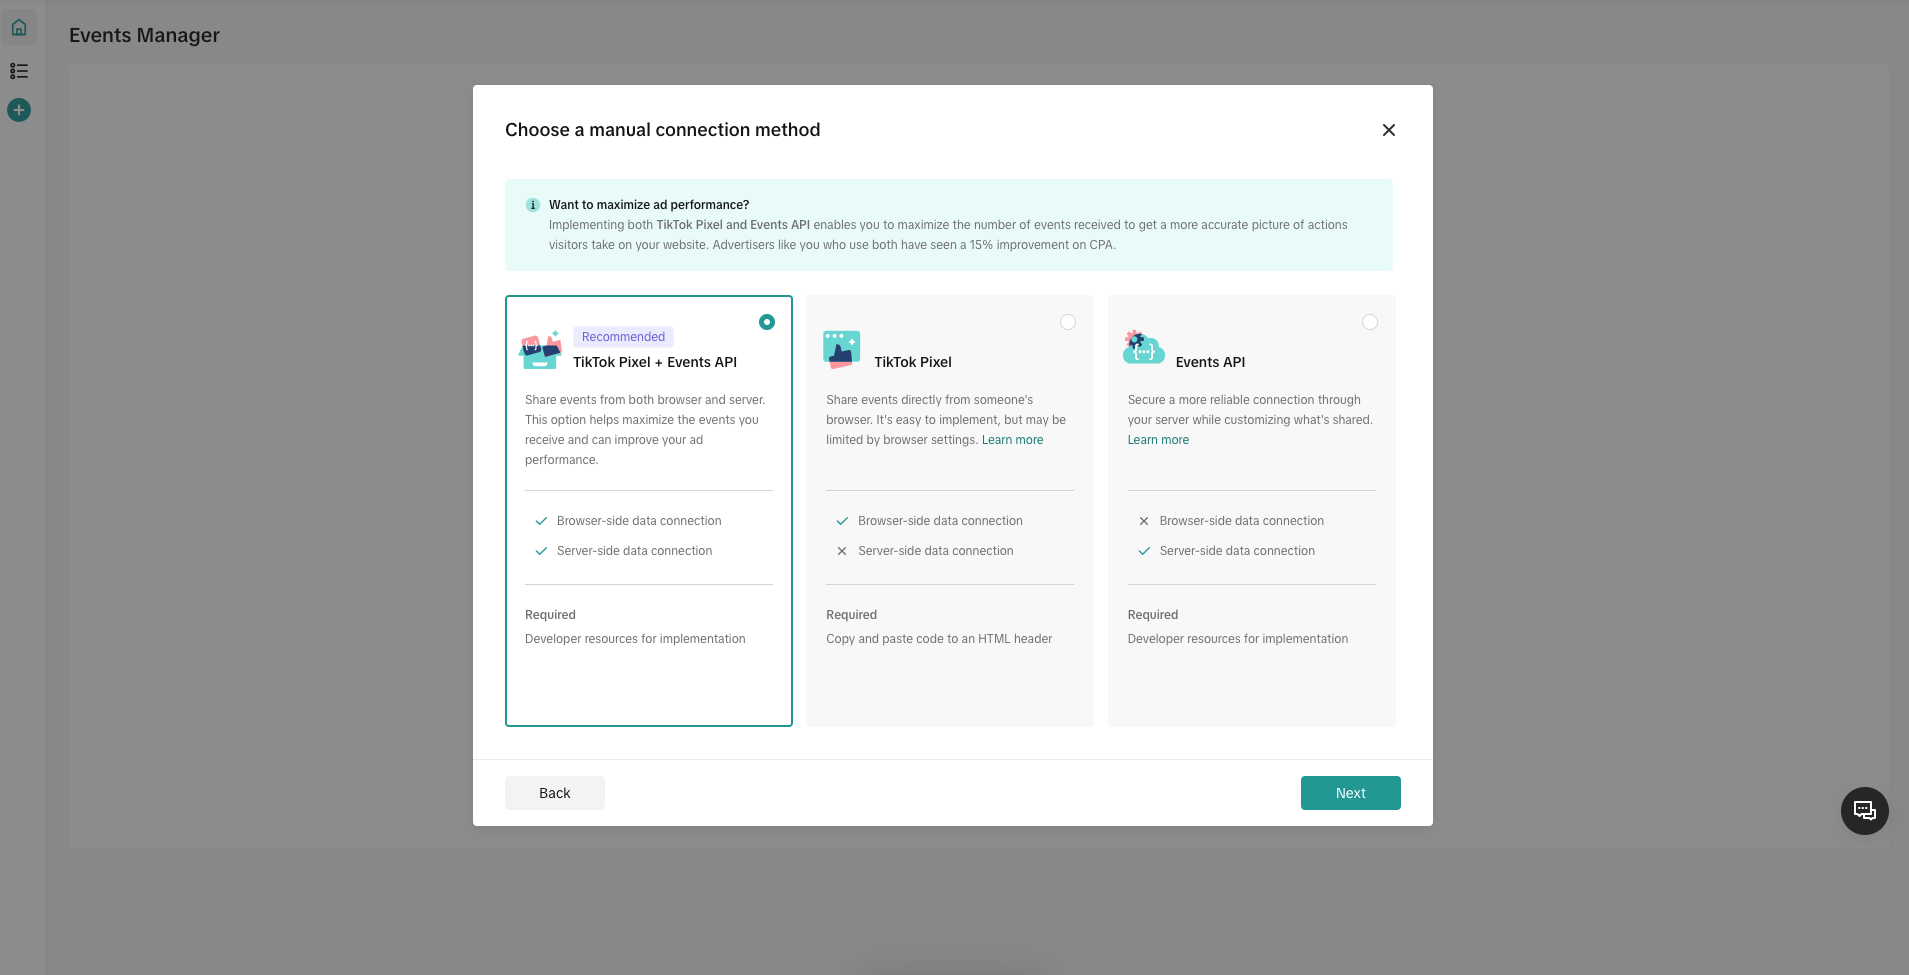
Choose the recommended connection method, TikTok Pixel and Events API
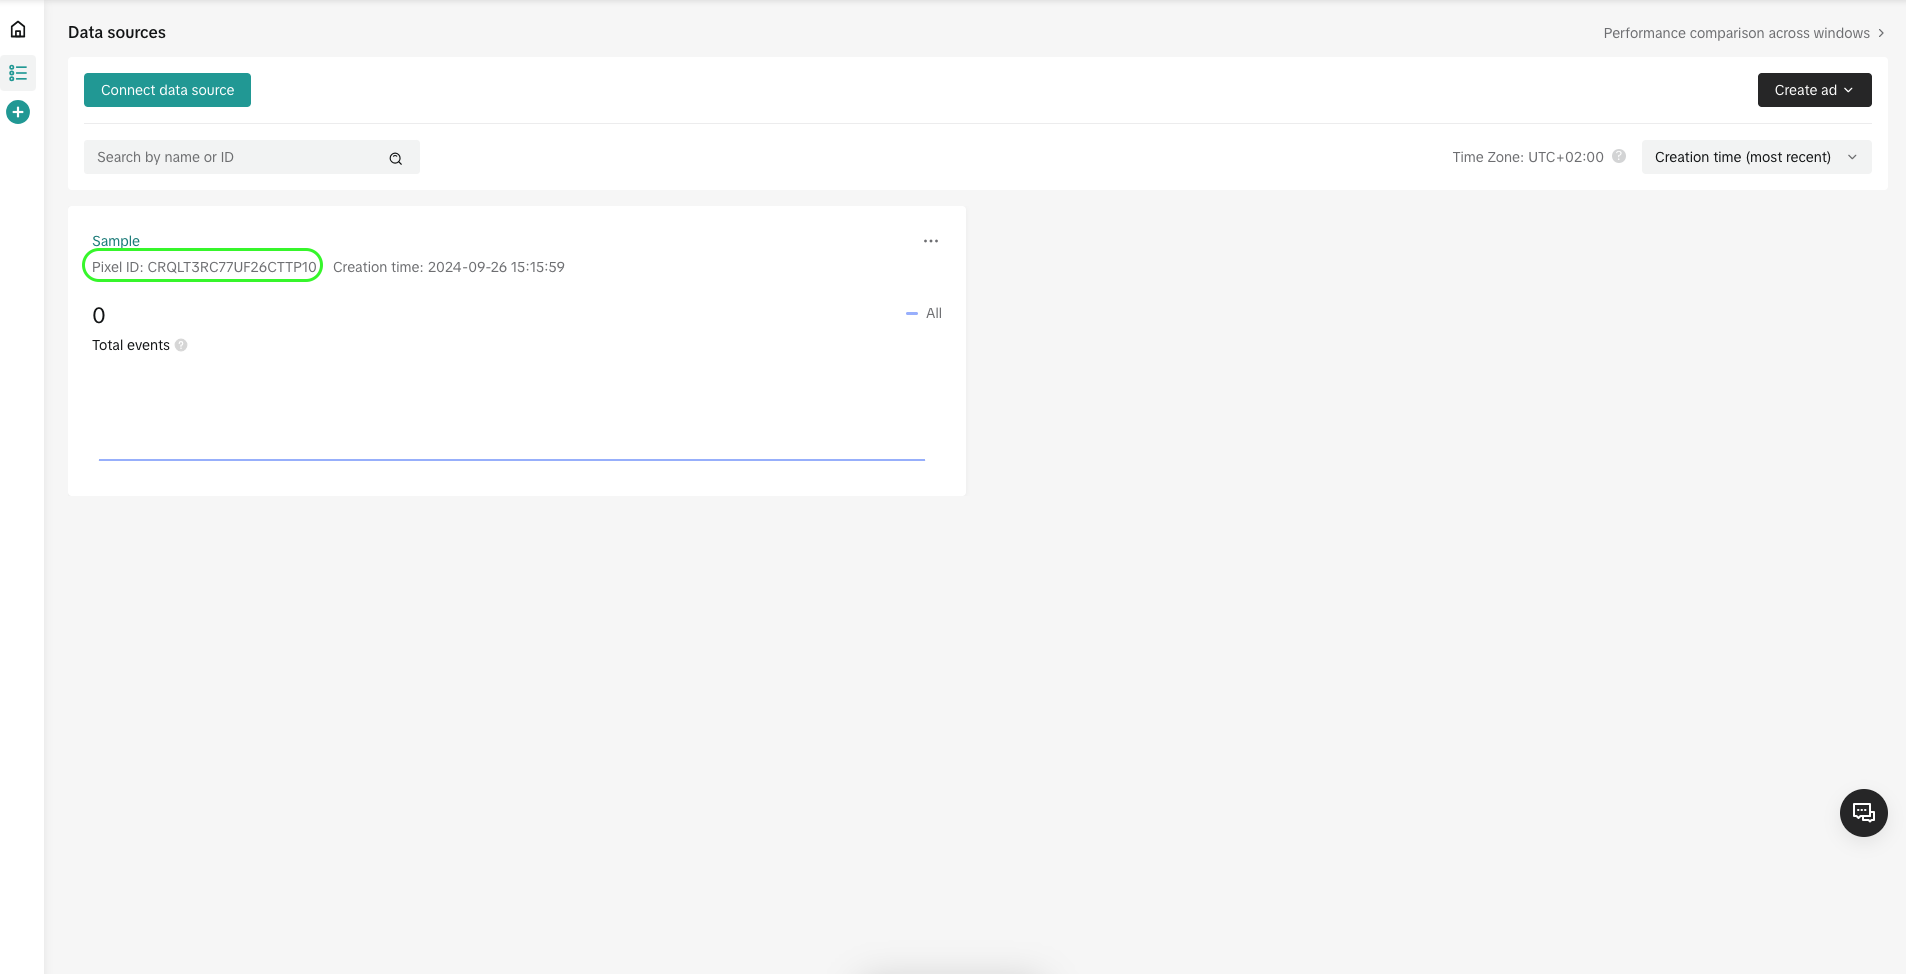
Copy the Pixel ID into the destination setup in Ply
X (formerly Twitter)
Go to the X ads reporting dashboard at ads.x.com
In the top bar, click Tools > Event manager
In the top-right corner, add an Event source and hit save. Copy the pixel ID into the destination settings:

To add a custom event, you'll need an event ID. Click Add event and set its type to custom. Define the parameters you intend to send from Ply.
Learn more here: https://business.x.com/en/help/campaign-measurement-and-analytics/conversion-tracking-for-websites
Adding an event template
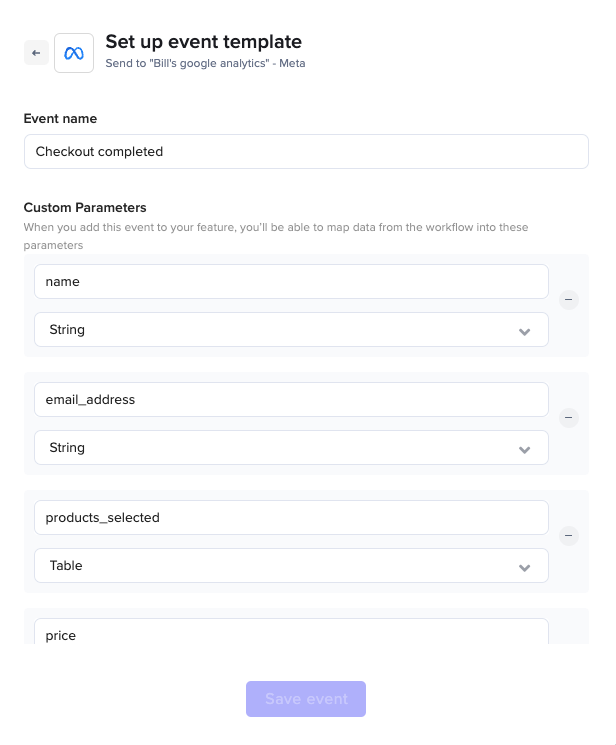
Event templates define how data from your portal's workflow gets sent to your tracking destination. Event templates include a few details.
Event name
Give your event a descriptive name. This will be useful once you look at events in your analytics platform, where you'll try to gain insight into how your customers are using your Ply portal. Some examples:
Request submitted
Checkout seen
Form completed
Typically, an event name like {{noun}} {{past-participle-verb}} will make sense in your analytics platform.
Custom parameters
Parameters are properties of events that will contain data about who performed the event, what exactly happened, and so on. Parameters typically fall into one of these categories:
User Identification Parameters: These parameters uniquely identify and track individual users across sessions and devices, helping to understand who performed an event. e.g. email, user_id
Event Parameters: These capture the specific action taken by a user, along with its details, to understand what happened during the interaction. e.g. items_selected, purchase_amount, quantity
Contextual Parameters: These provide additional information about the environment and circumstances in which the event occurred. e.g. timezone, referrer, page_url
Each event parameter has a name and one of these data types
string (e.g. name, email, phone number)
list i.e. array of values (e.g. emails, product_IDs)
table i.e. array of objects (e.g. products)
Track events in your portal workflows
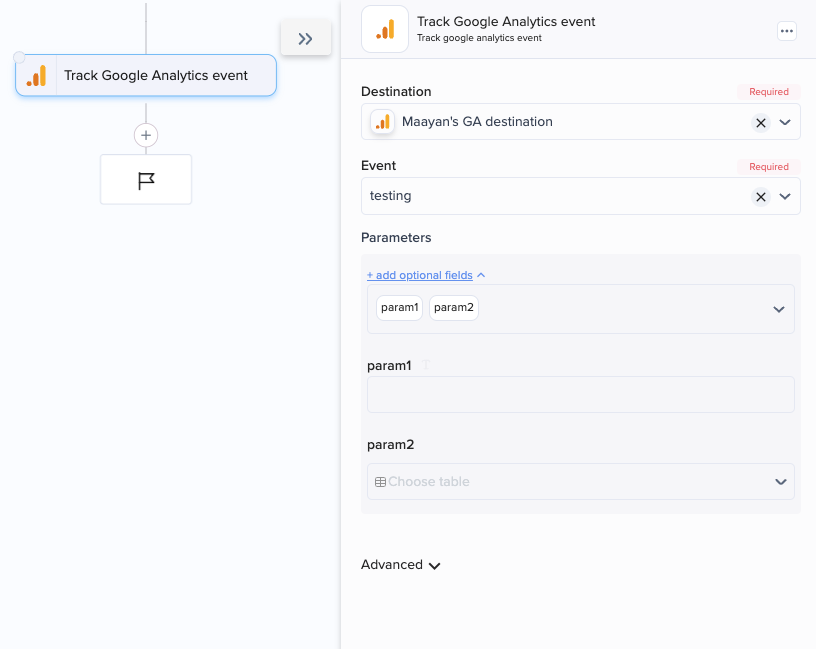
Once you've saved your event template, you can add steps to your portal workflow that track events of this type in your destination.
Add a step to your workflow called Ply event tracking
Choose the destination that you want to send data to
Choose the event template for the event you want to track
Select the event parameters that you want to fill with workflow values – they'll appear as mappable fields in the step setup
Test your portal's workflow to ensure that events are being sent correctly to your destination
Last updated