
Building basics
Creating a workflow
Features in Ply are built like workflows. Workflows are a series of steps that run one after the other.
Example
This add-on shows an interface where you enter your message. Your message and the message from Gmail get sent to Slack.
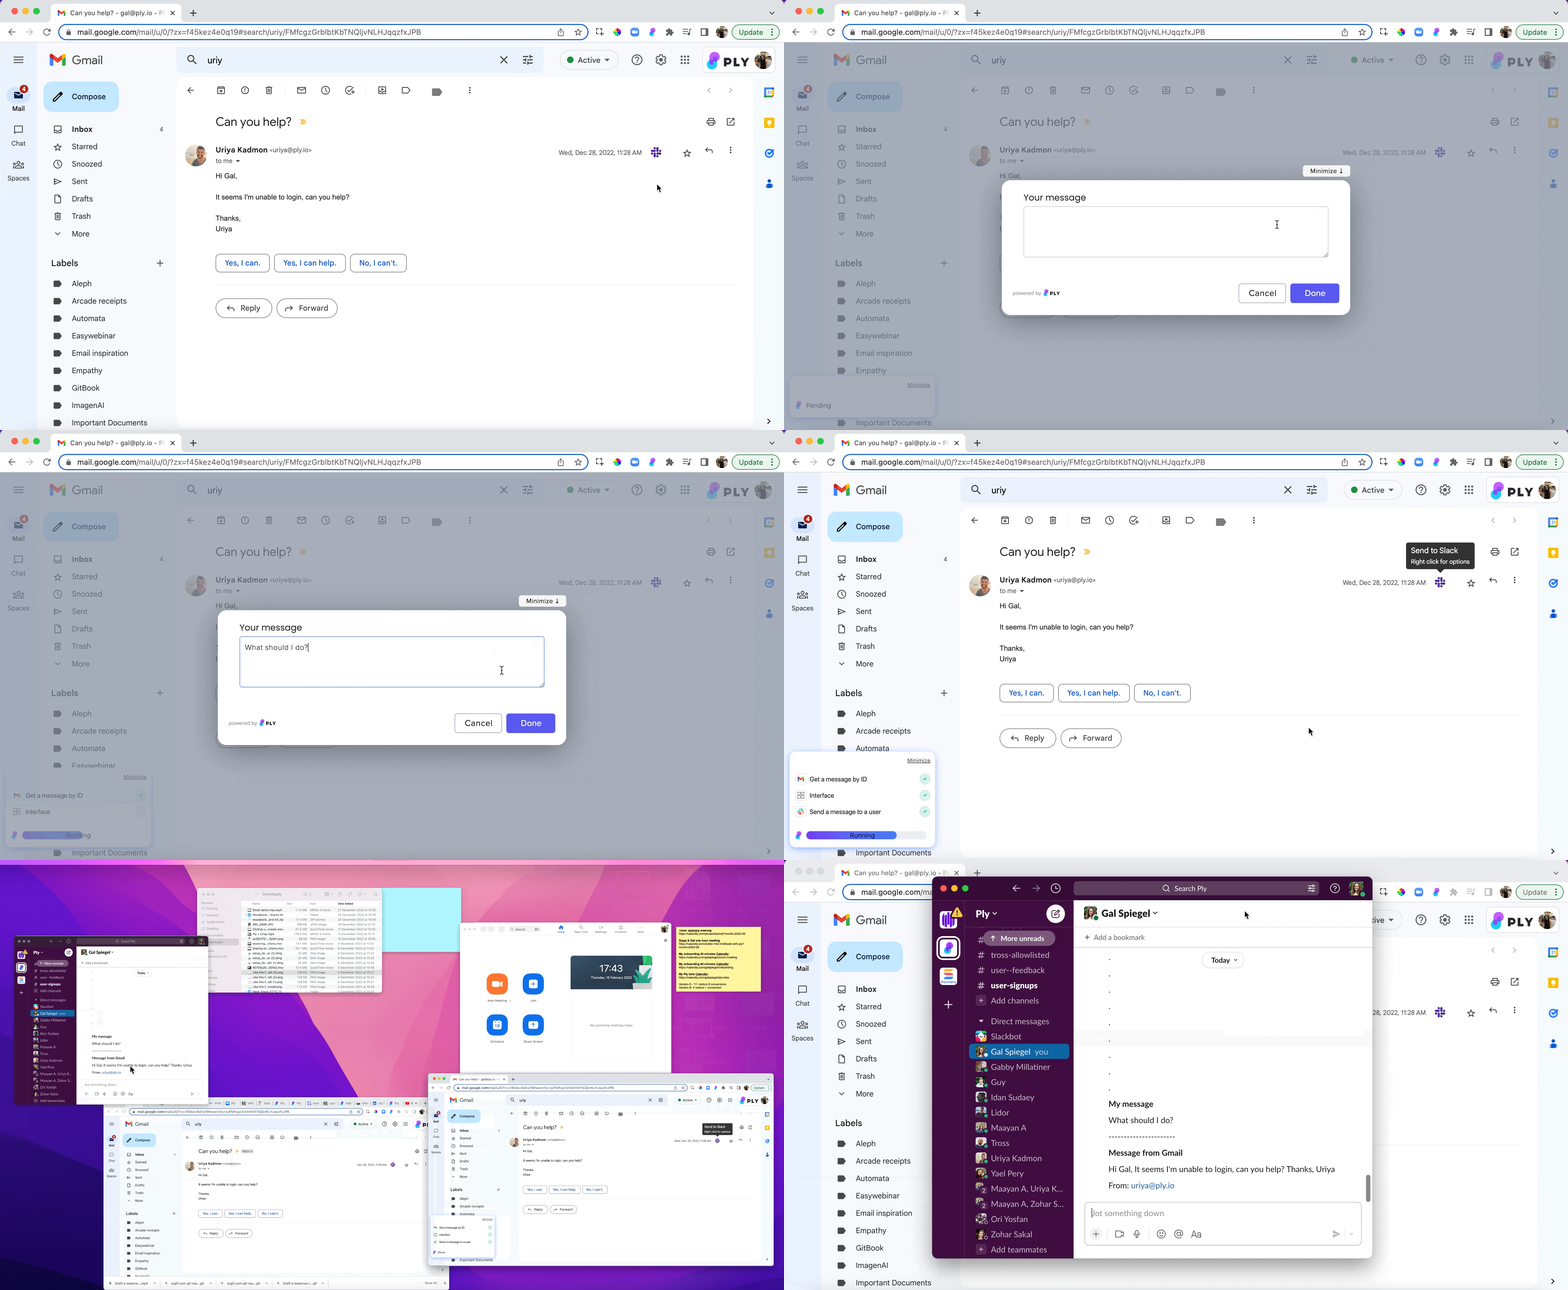
This is how its workflow, made of 4 steps, looks in the builder:
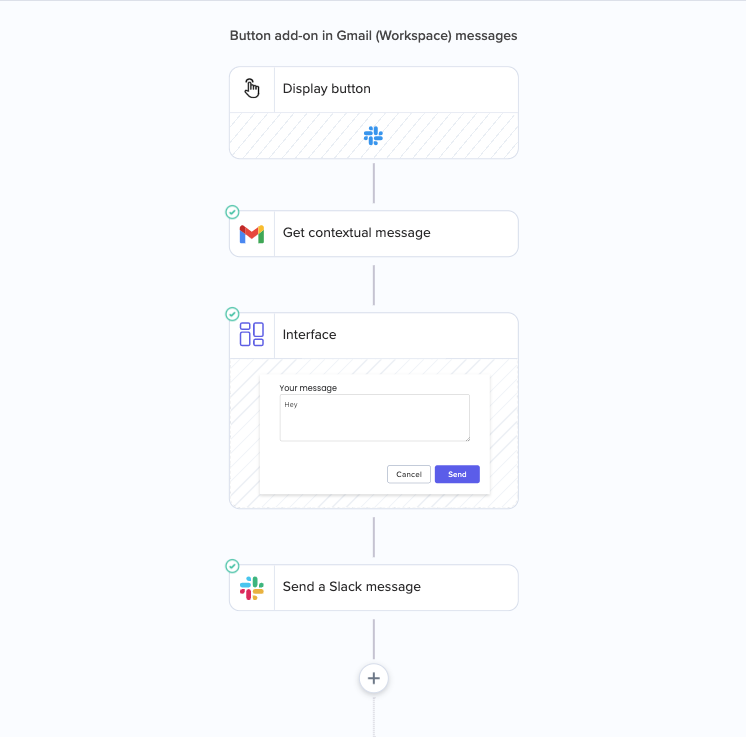
Each part of the workflow is a step. The first step is the trigger, which makes the feature start.
Adding and testing steps
There are 2 types of steps in Ply:
User-facing steps – get the input of the person using the feature
Actions – connect to your apps, manipulate data, run conditional logic, and more
You need to test every step. This means running it once in the builder with sample input and getting sample output.
To do this, click Test step at the bottom of the step setup.
Connecting your apps
To give your feature authorization to perform an action in your app, you'll need to create an account connection. These are credentials, stored securely, that authorize Ply to perform only the specific action that you add to your workflow.
Mapping dynamic data
There are two types of data that a step can receive: dynamic and hard-coded data.
Dynamic data is created by mapping one step's output as another step's input. As a result, it may change every time the feature is run.
For example, here the contextual message is dynamically mapped to prefill an interface:
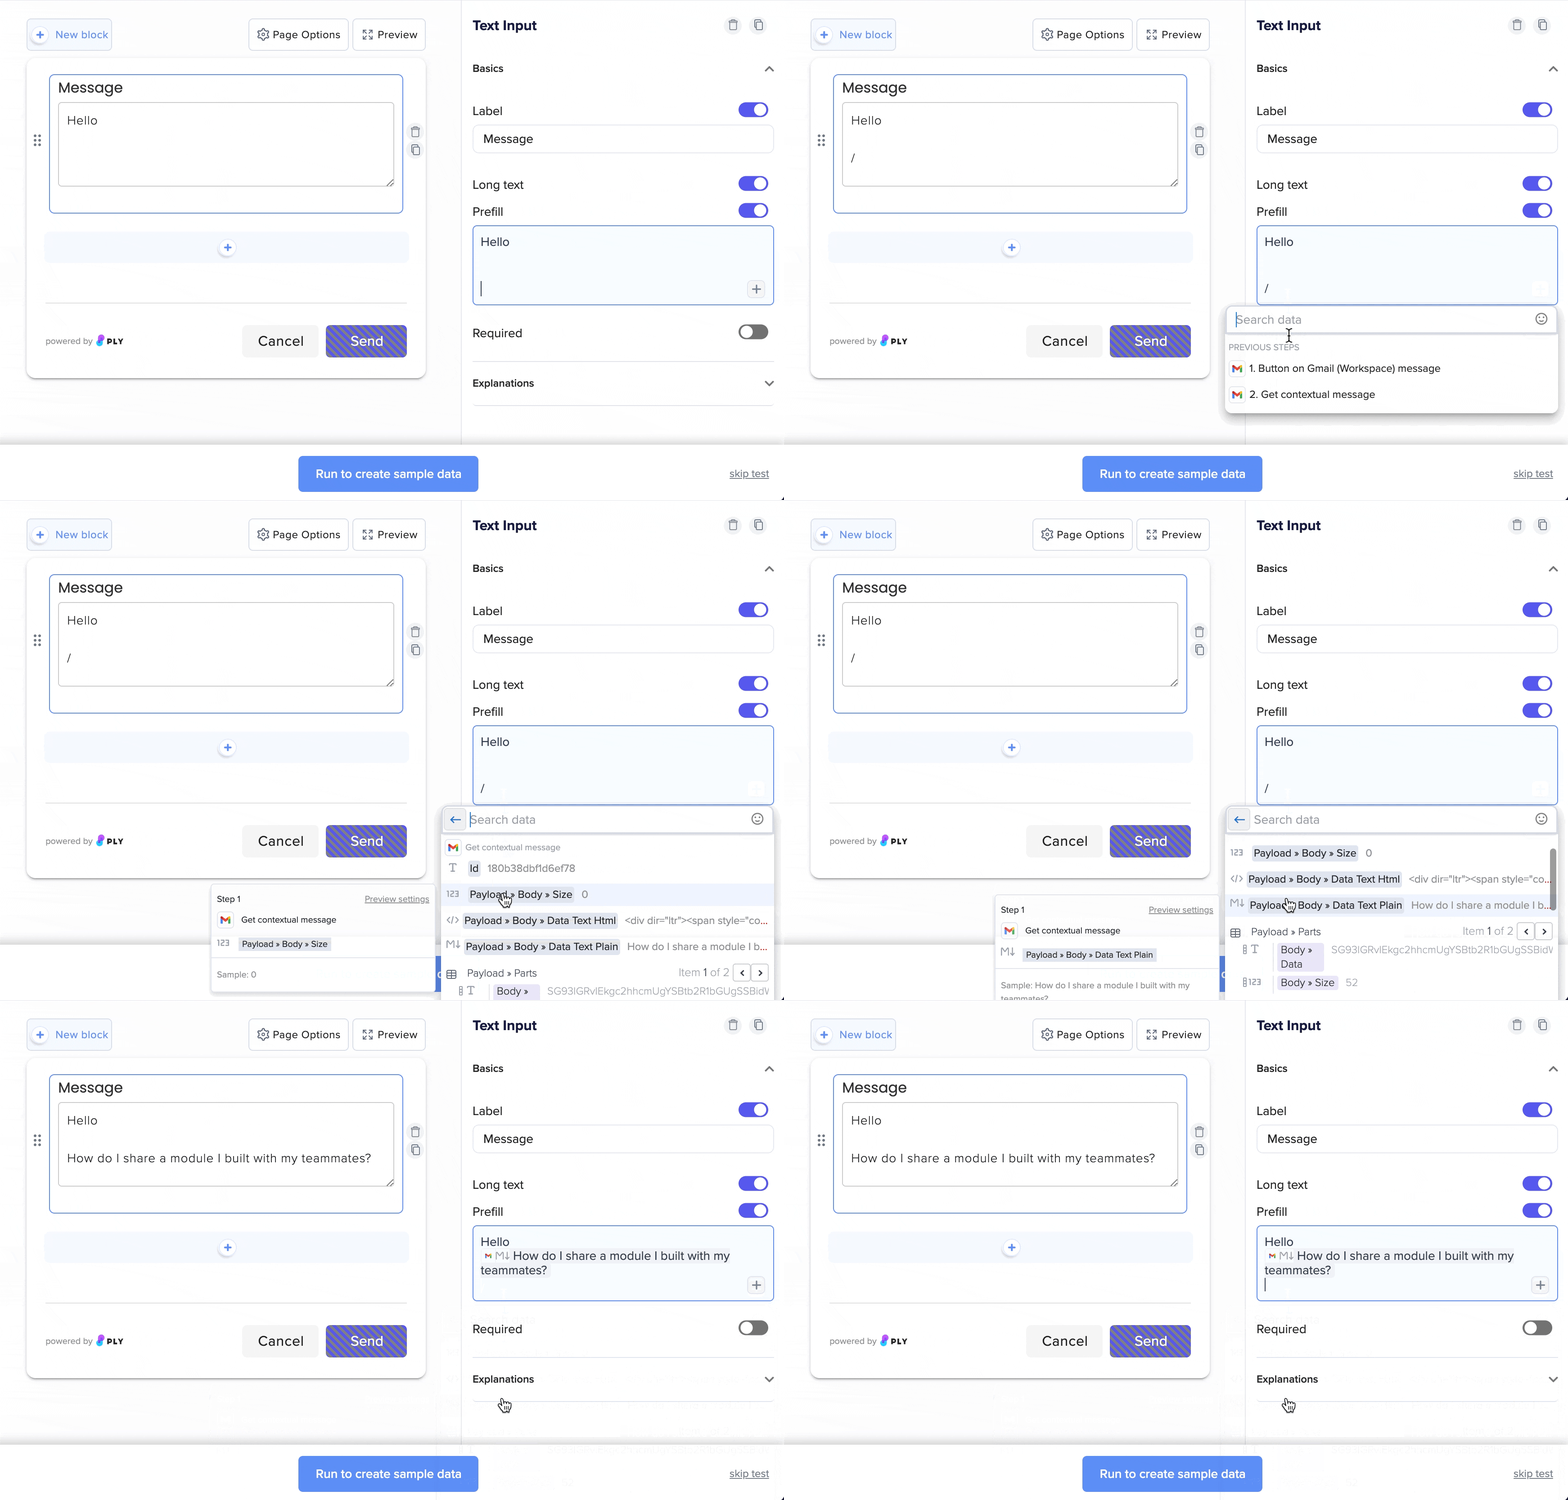
Add dynamic data to a step's setup using the data mapper, which shows you the output of all previous steps in the workflow. It's searchable. Open the data mapper by typing "/" or clicking on the +-button in a field.
Hardcoded data is determined when you build the feature and does not change when the feature runs.
Last updated