
Blueprints
Share your portals as blueprints, which let your users see the workflow behind your portal as they experience the user-facing steps
Blueprints let you share your portal ideas in an accessible way. They reveal how your portal integrates with your apps, routes users using conditional logic, and handles complex data manipulations that users typically don't see.
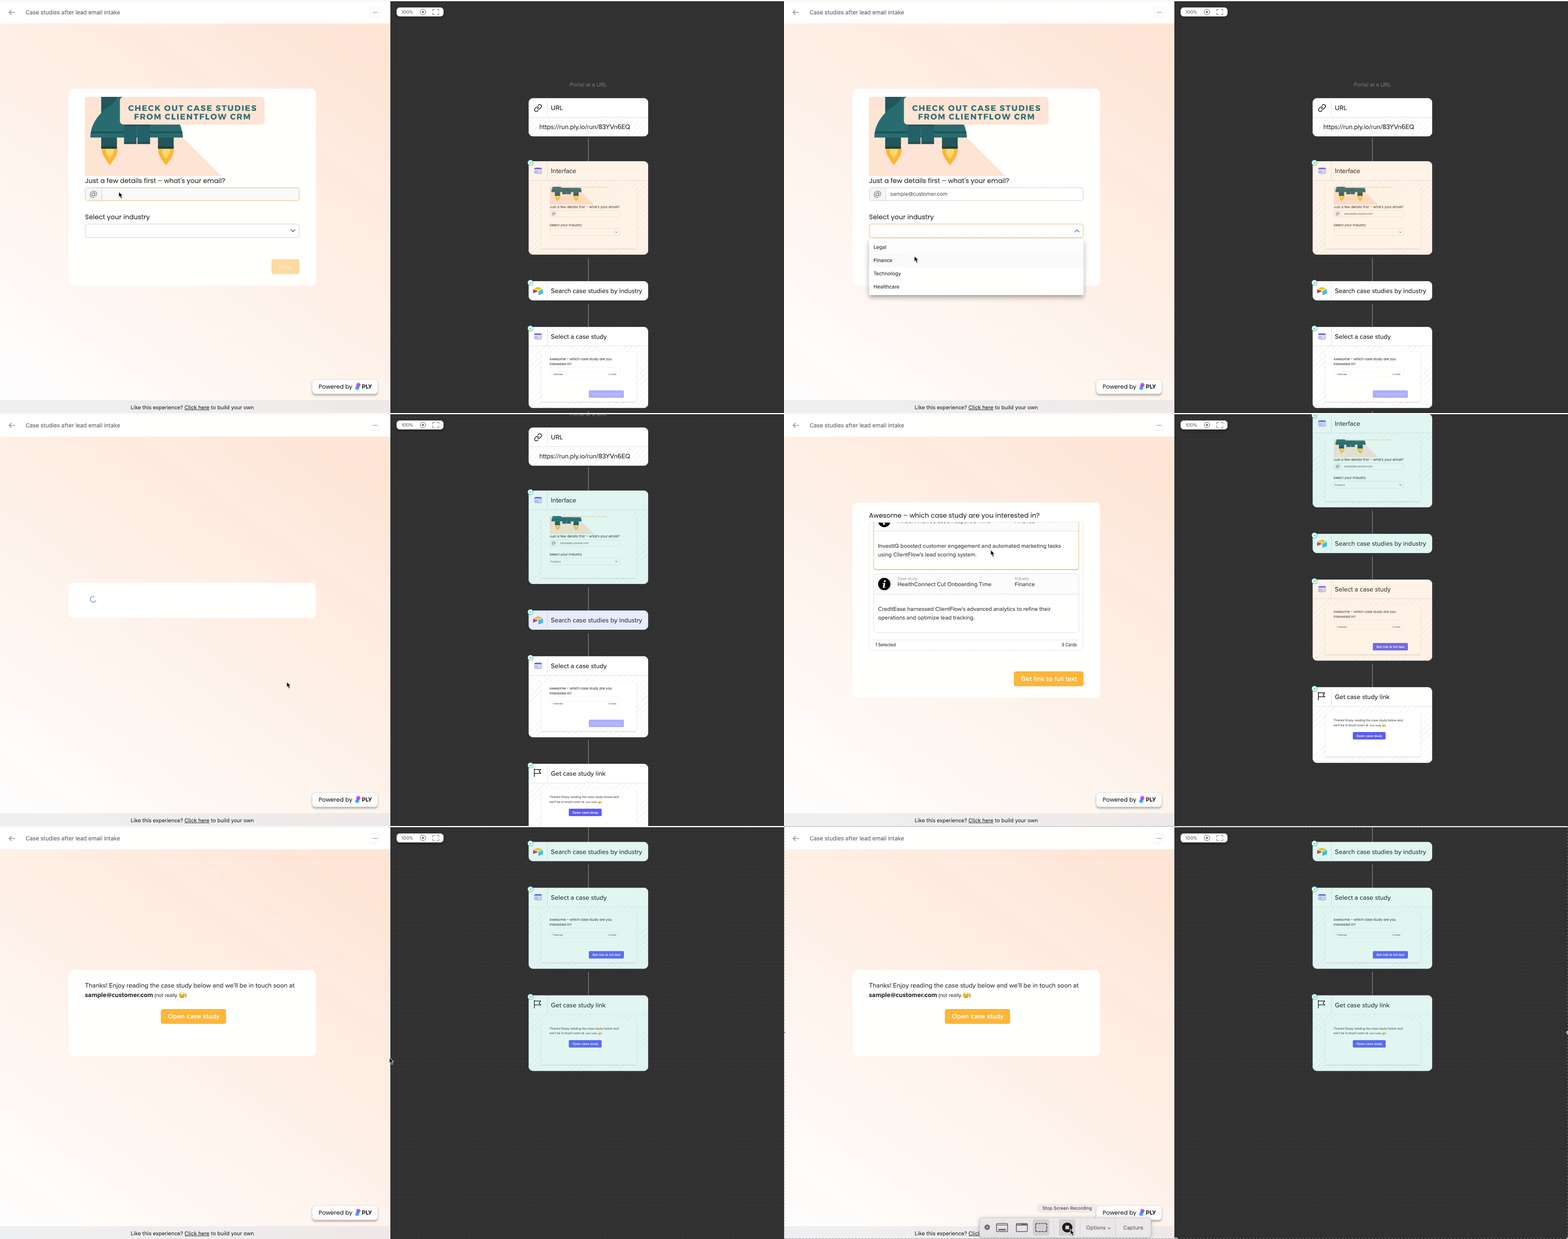
When your users experience your portal as a blueprint, they see the user-facing steps side-by-side with the workflow, like this:
Creating and managing a blueprint
You can create blueprints for portals that have been published. They are created in the feature builder.
In the feature builder, click on the Share tab in the topbar
Click on the Blueprints tab
Click Create blueprint
Give your blueprint a title and description. Decide whether you want it published under your name or your workspace's name.
A few important notes:
The brand panel will not be displayed when running a blueprint
If you republish your workflow, this doesn't automatically affect the blueprint. You need to click Update blueprint to current version in the blueprint settings.
Sharing blueprints
You can share your blueprint with other Ply builders. Blueprint runs do not use tasks or credits.
Note: Running the blueprint actually runs all of the steps in the workflow.
Referrals
(coming soon)
Last updated